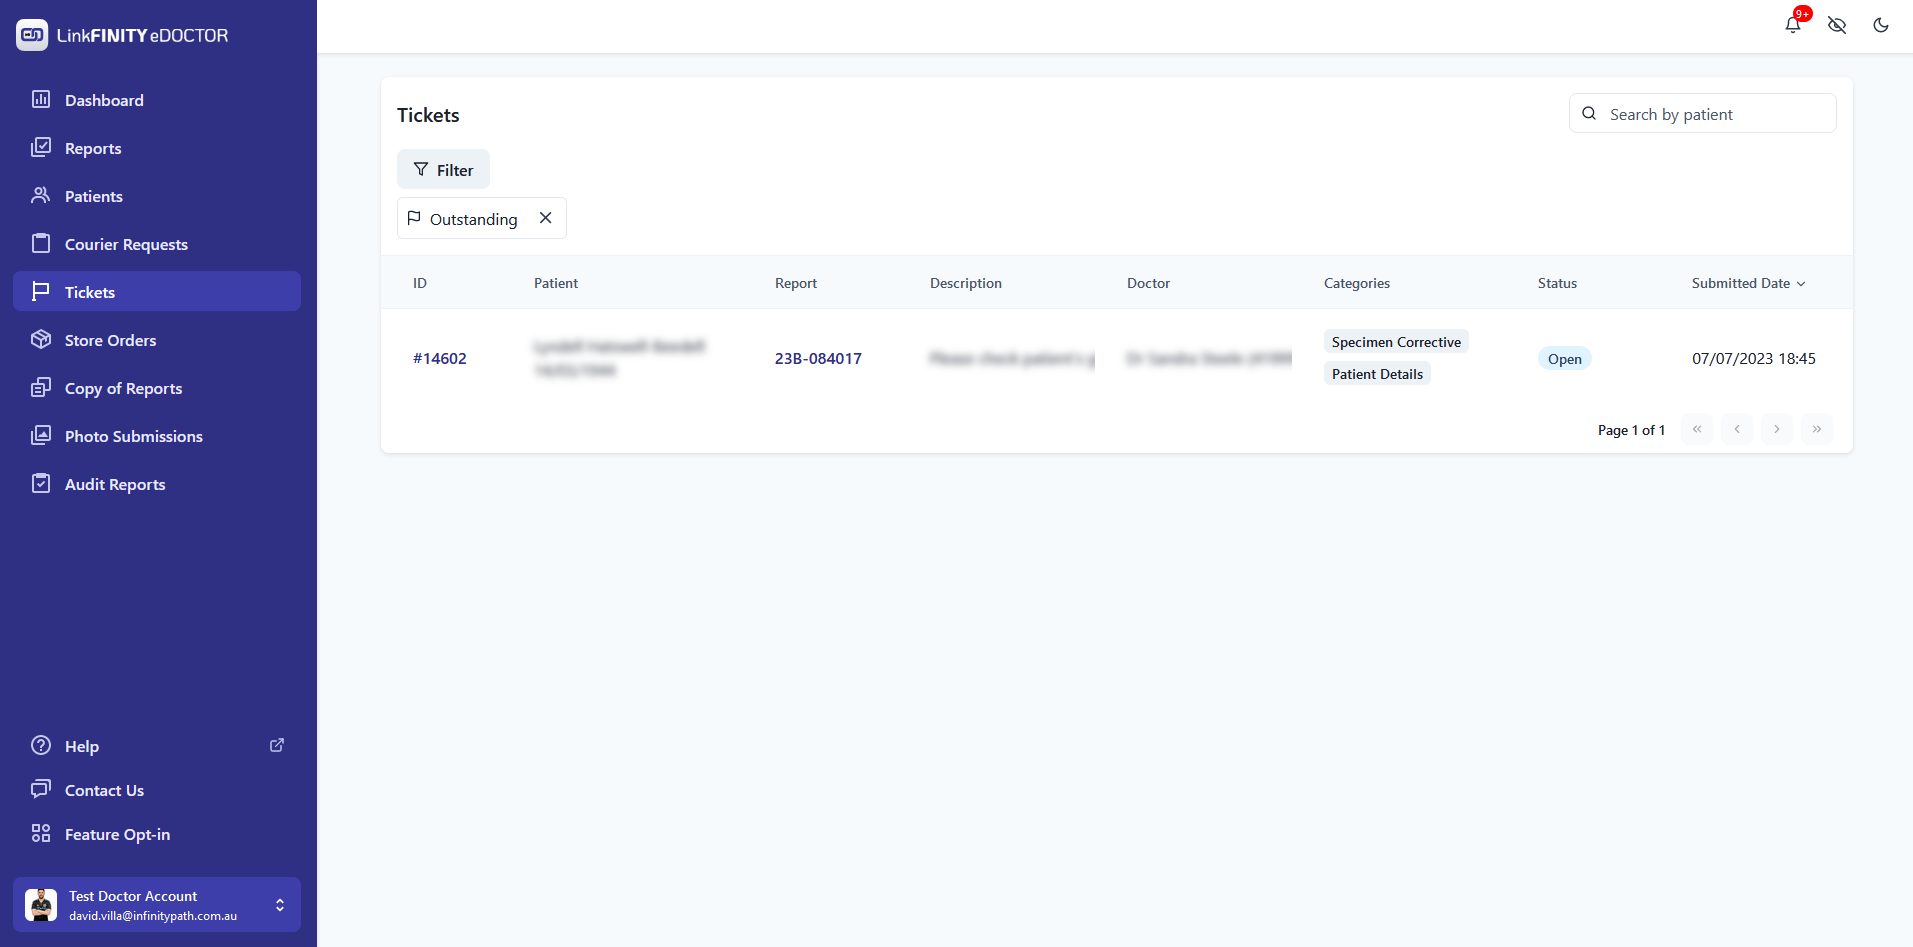
FAQ
eDoctor Frequently Asked Question
- Mark All Reports as Read
- Update Profile Information (Preferred Name, Contact Number, Password)
- How to make store order
- How to create pick up request (Specimen ready for collection)
- How to download eDoctor on your phone
- How to reset the password
- Requesting Histopathology Reports via eDoctor
- Upload Clinical Photos
- How to submit a report inquiry
Mark All Reports as Read
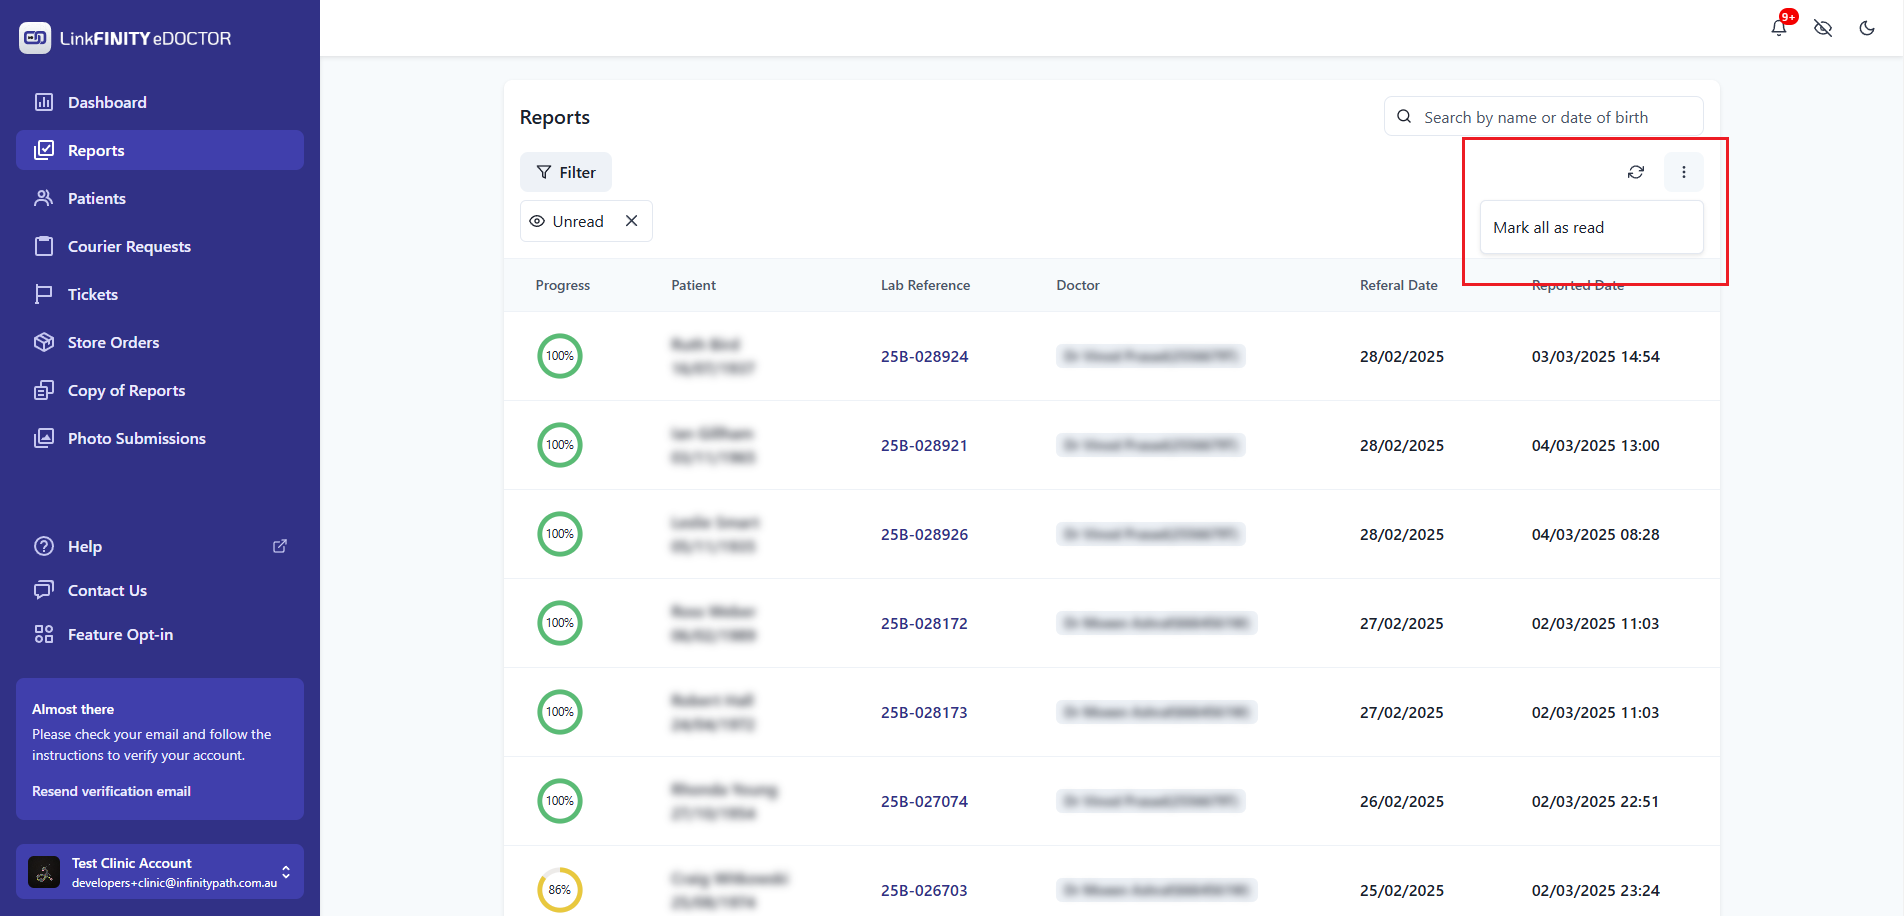
Update Profile Information (Preferred Name, Contact Number, Password)
-
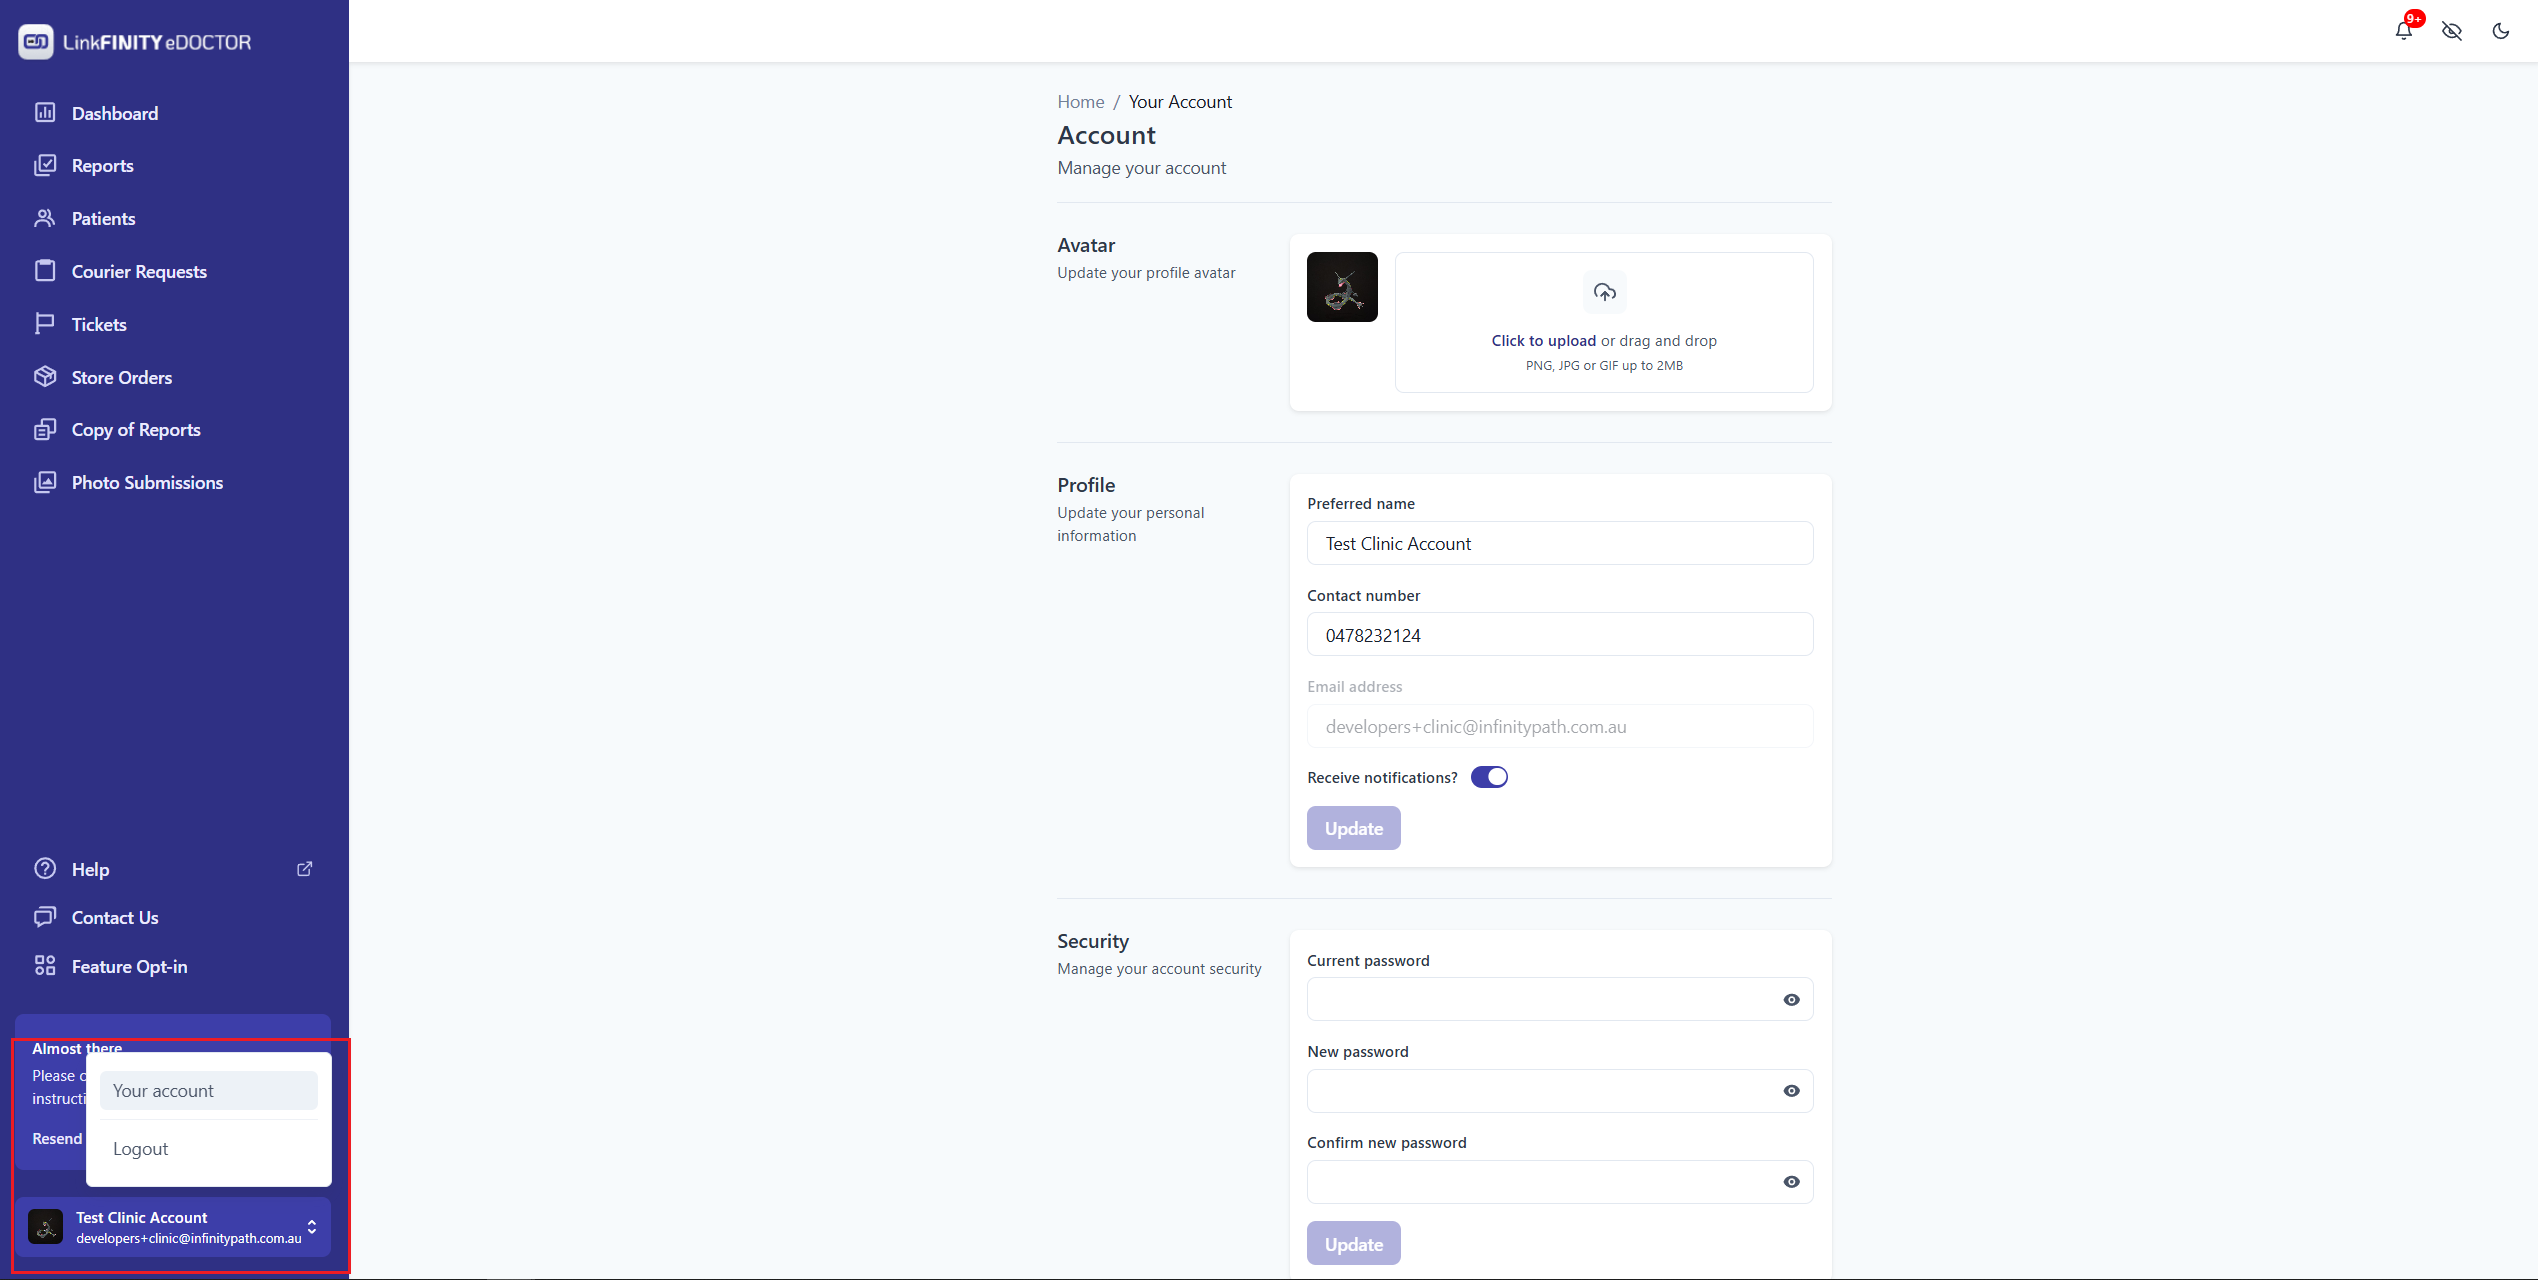
Access Your Account:
- Click on the your account icon in the bottom left corner.
- Then, select "Your account" from the dropdown menu. This will direct you to your account settings.
-
Update Preferred Name and Contact Number:
- In the "Profile" section, you will find fields for "Preferred name" and "Contact number".
- Enter your desired preferred name and contact number in the respective fields.
-
Update Password (if needed):
- Scroll down to the "Security" section.
- To change your password, you'll need to fill in these fields:
- "Current Password": Enter your current password.
- "New Password": Enter the new password you want to use.
- "Confirm New Password": Re-enter your new password to confirm it.
- Save Changes: Click the "Update" button located within the "Profile" or "Security" sections to save your changes. Note: the button is only in the "Profile" and "Security" sections, update it depending on the information that you want to change.
How to make store order
In this page, you will learn how to:
-
Make a store order.
- Order an item that is not visible on the products list.
Make a store order
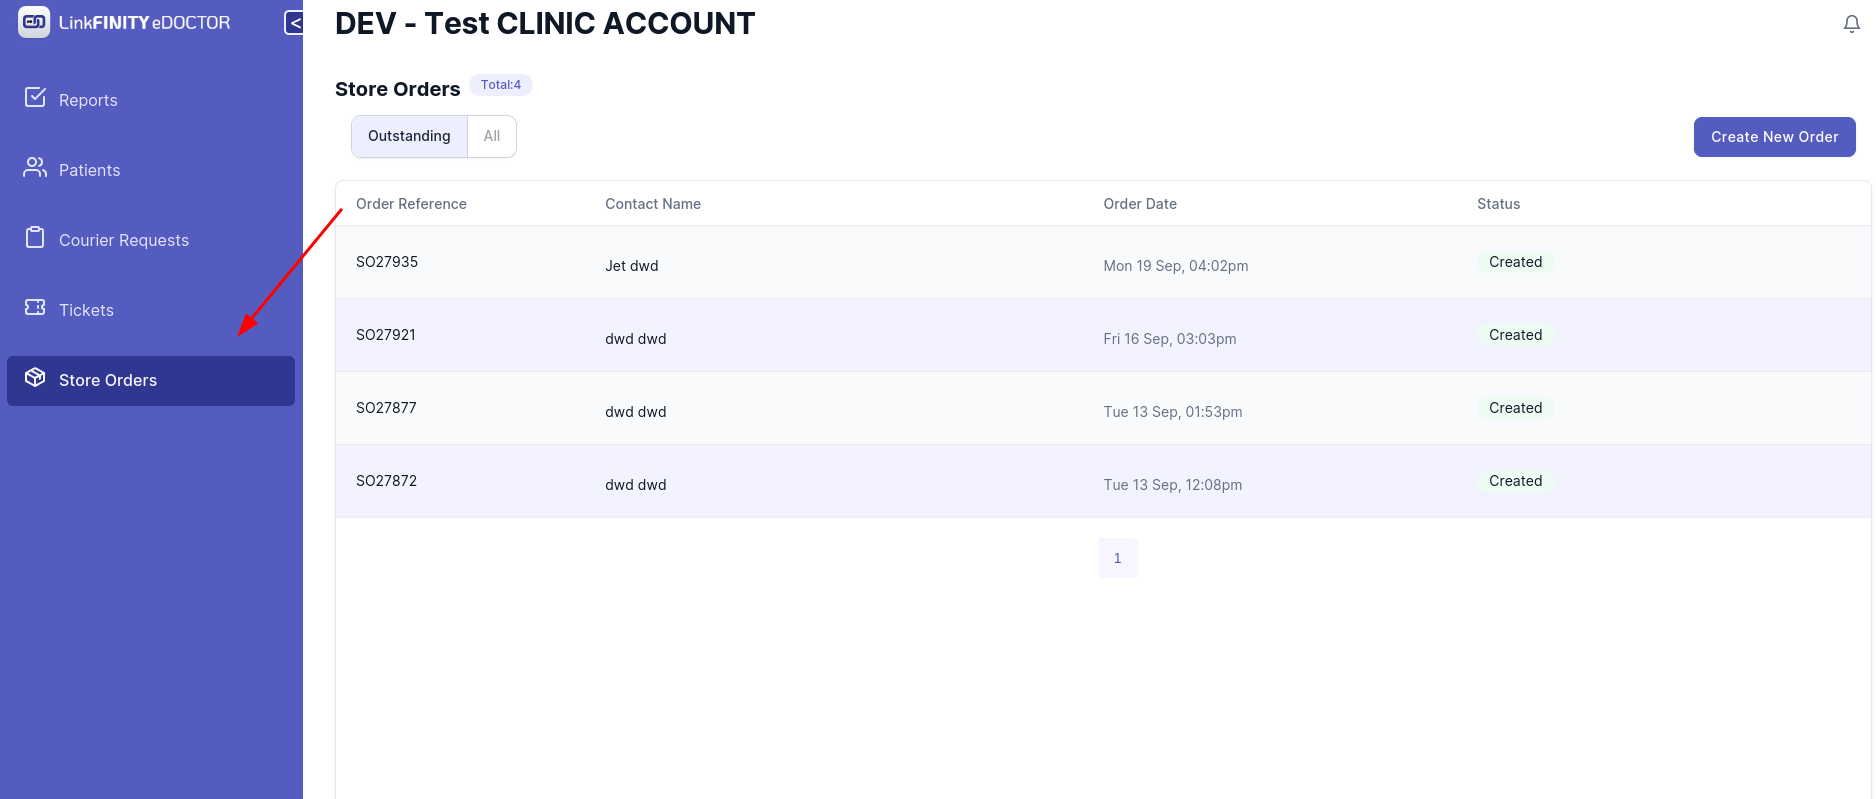
2. Click on `Create New Order` Button
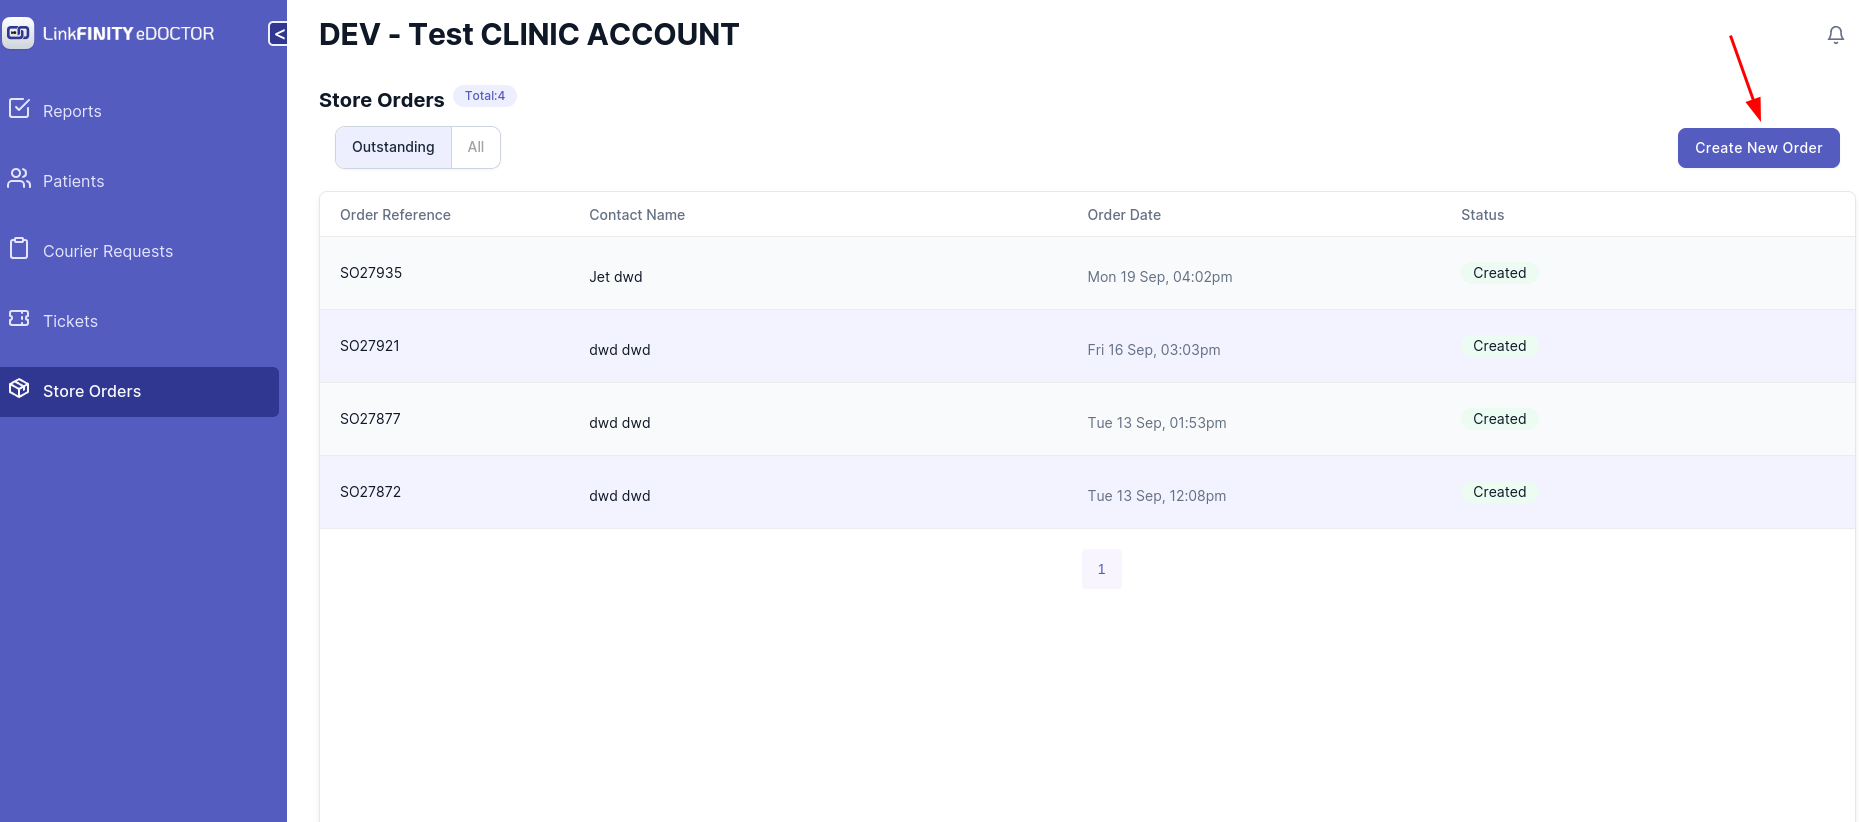
3. This Page should be showing
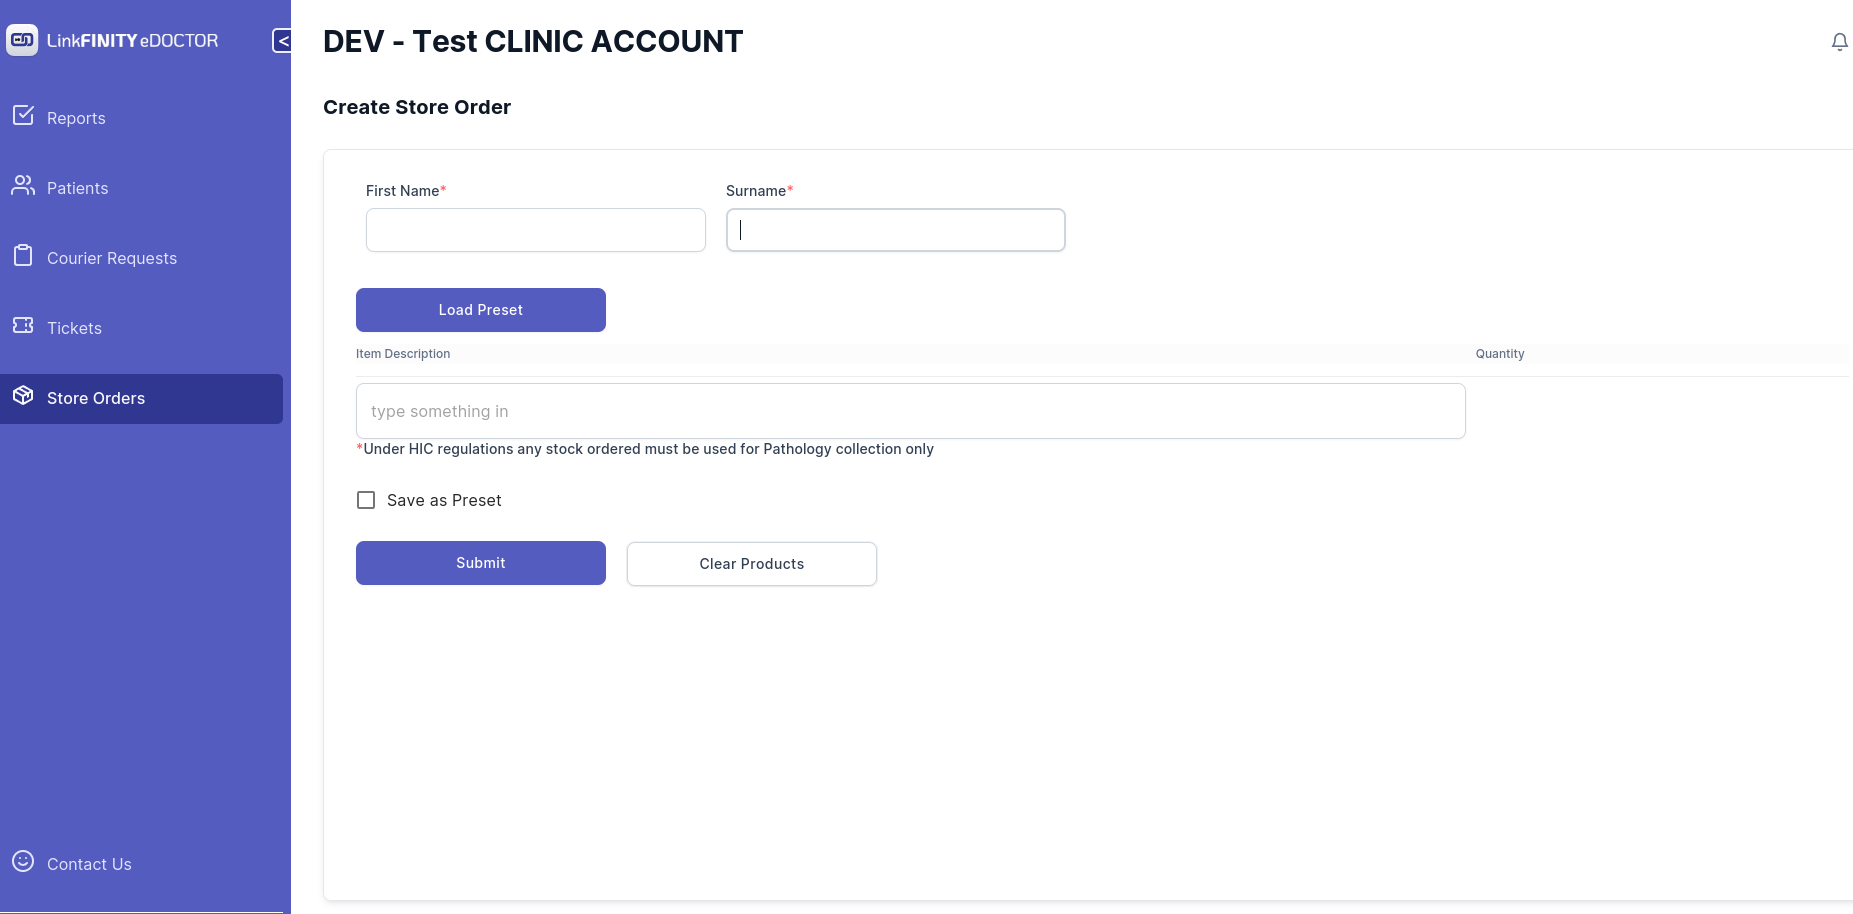
4. Type in your First Name and Surname in corresponding text box
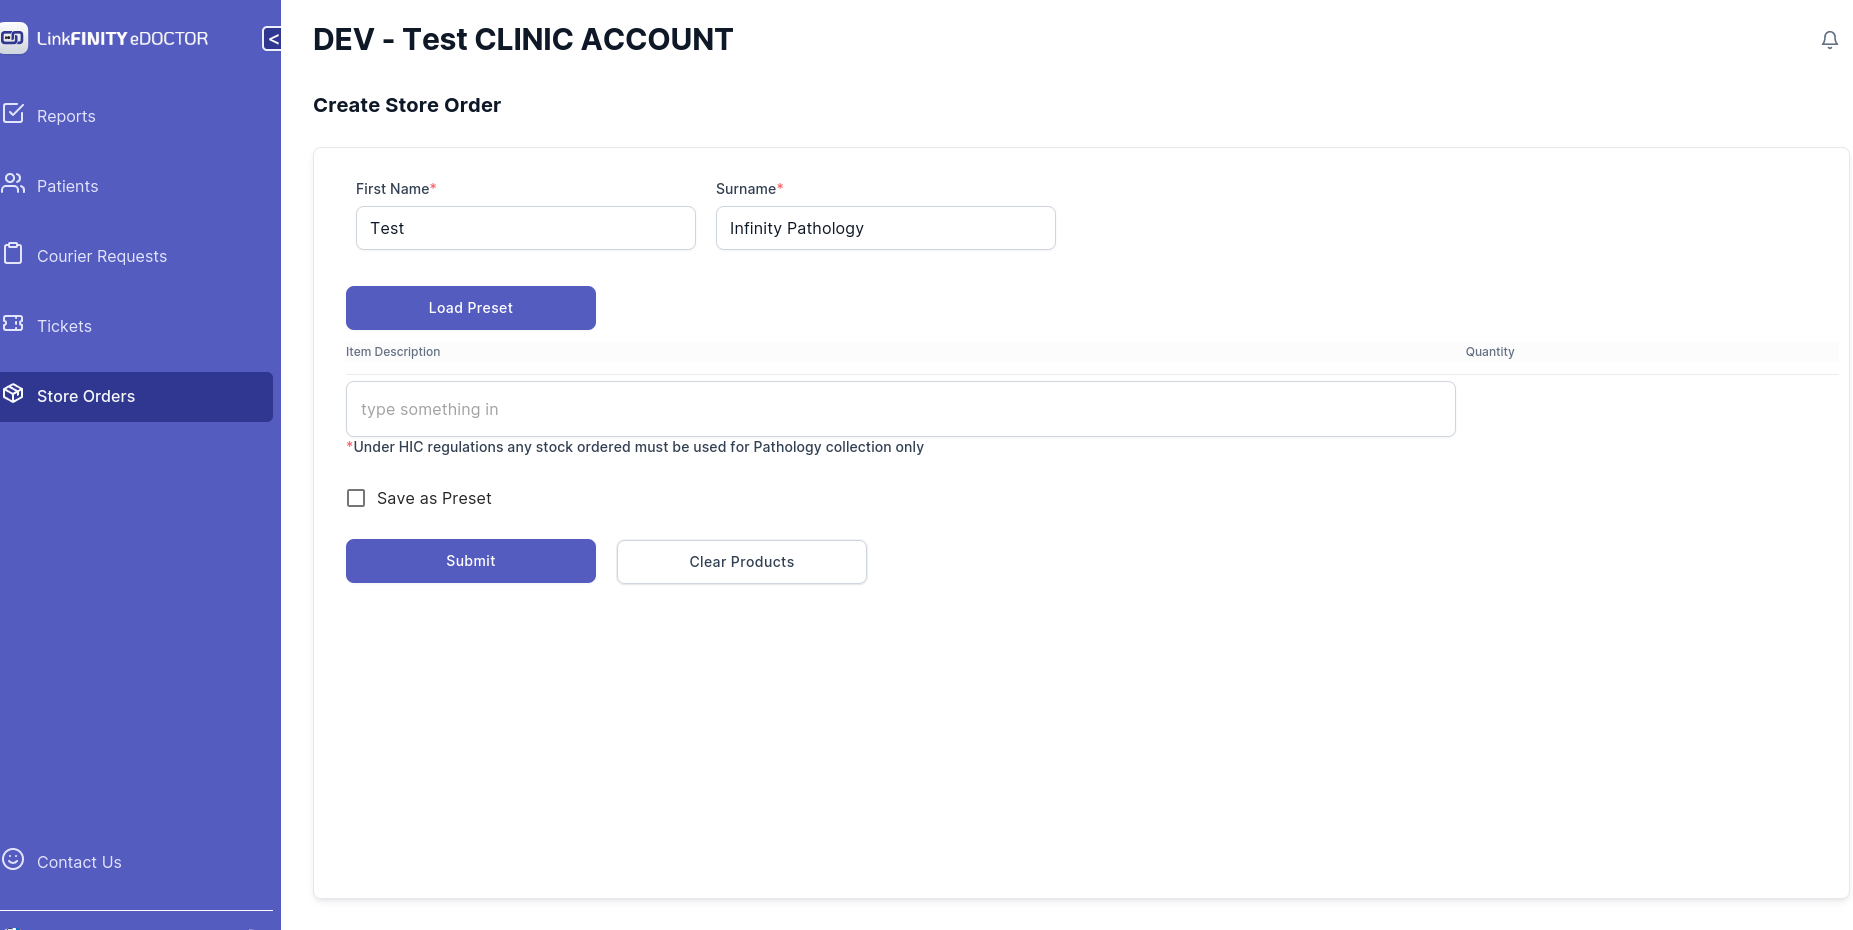
5. Start Typing in the search box
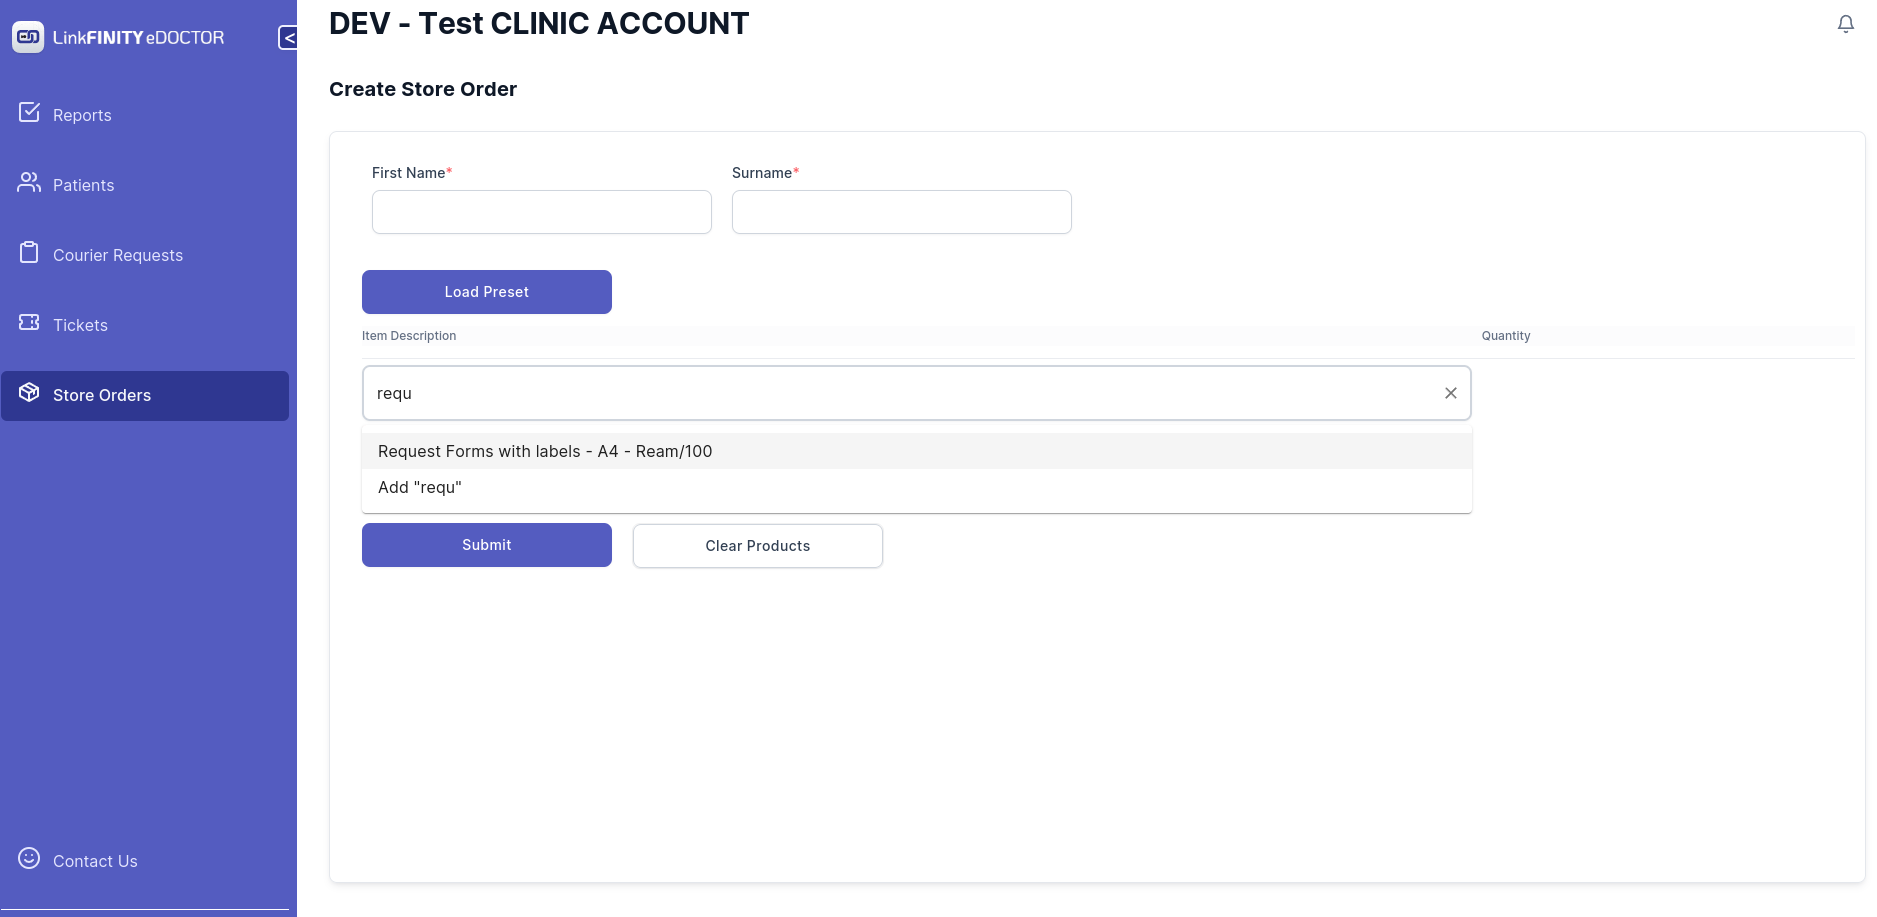
6. use mouse to left click on the product or hit enter key on your keyboard to select the product
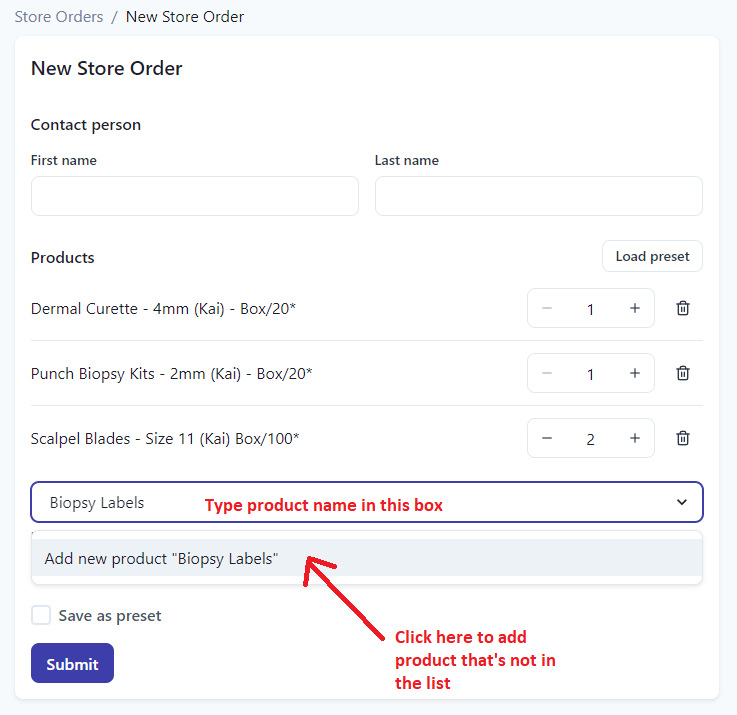
7. If the product happens to be not in the list. an option would pop up saying `Add ProductName`
use mouse to click it or just hit enter key on your keyboard to select
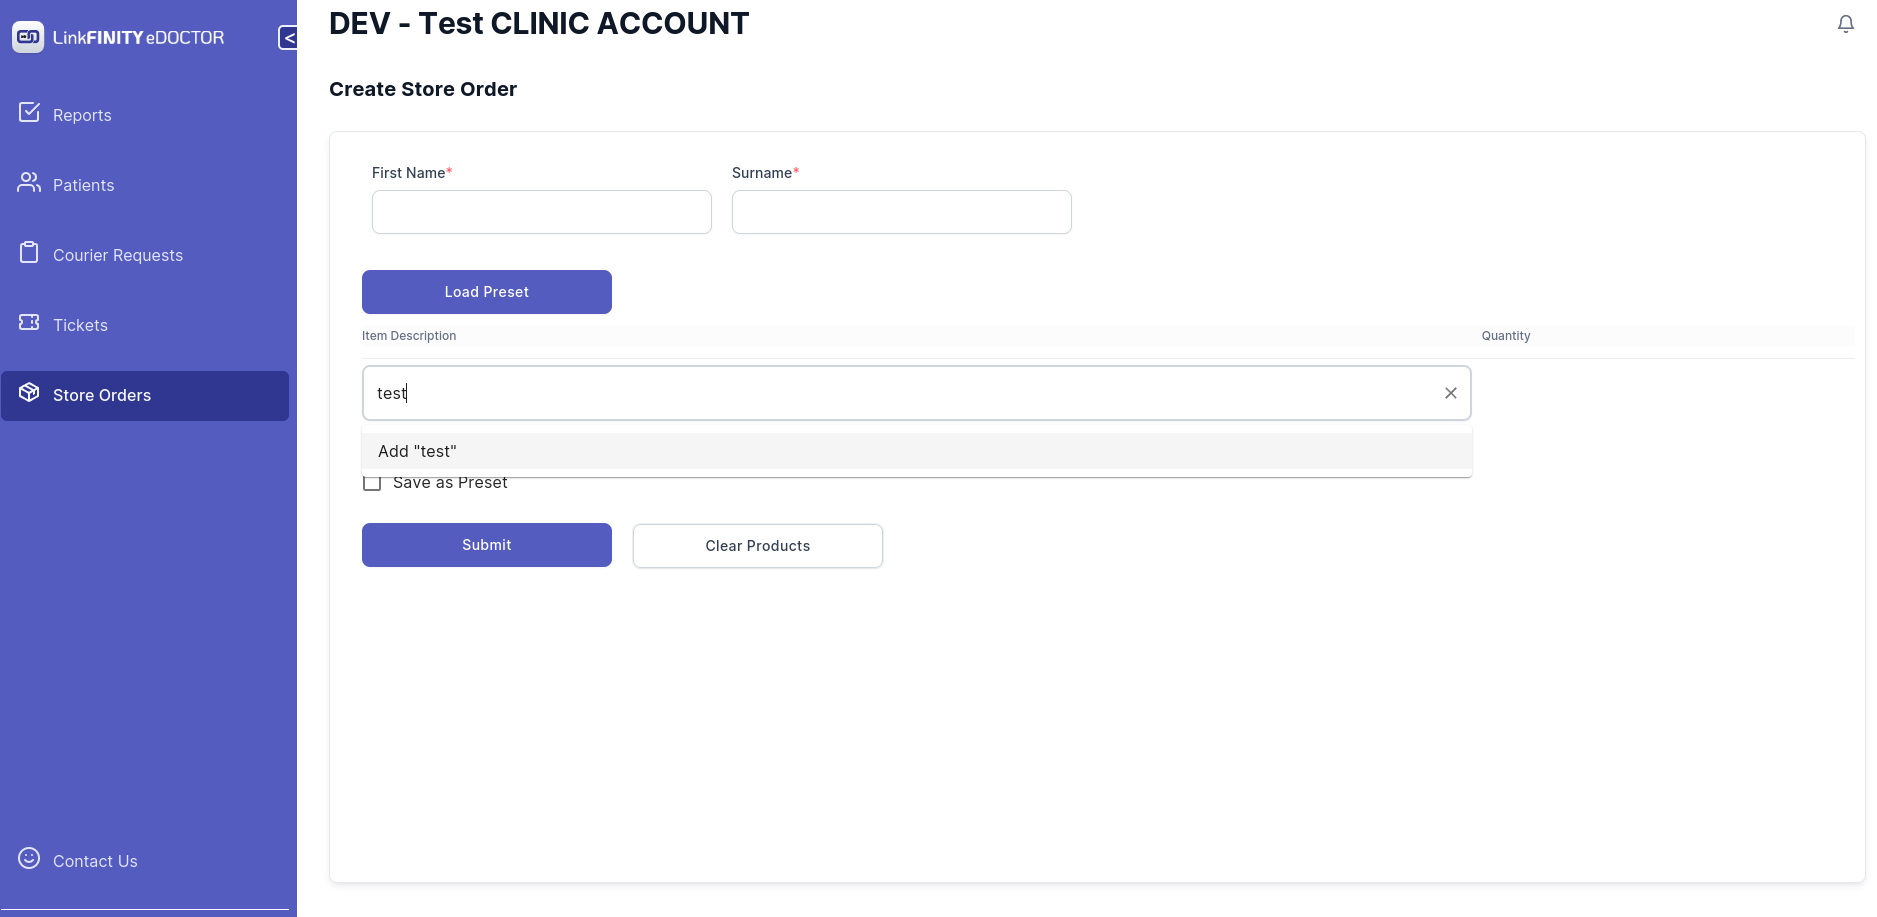
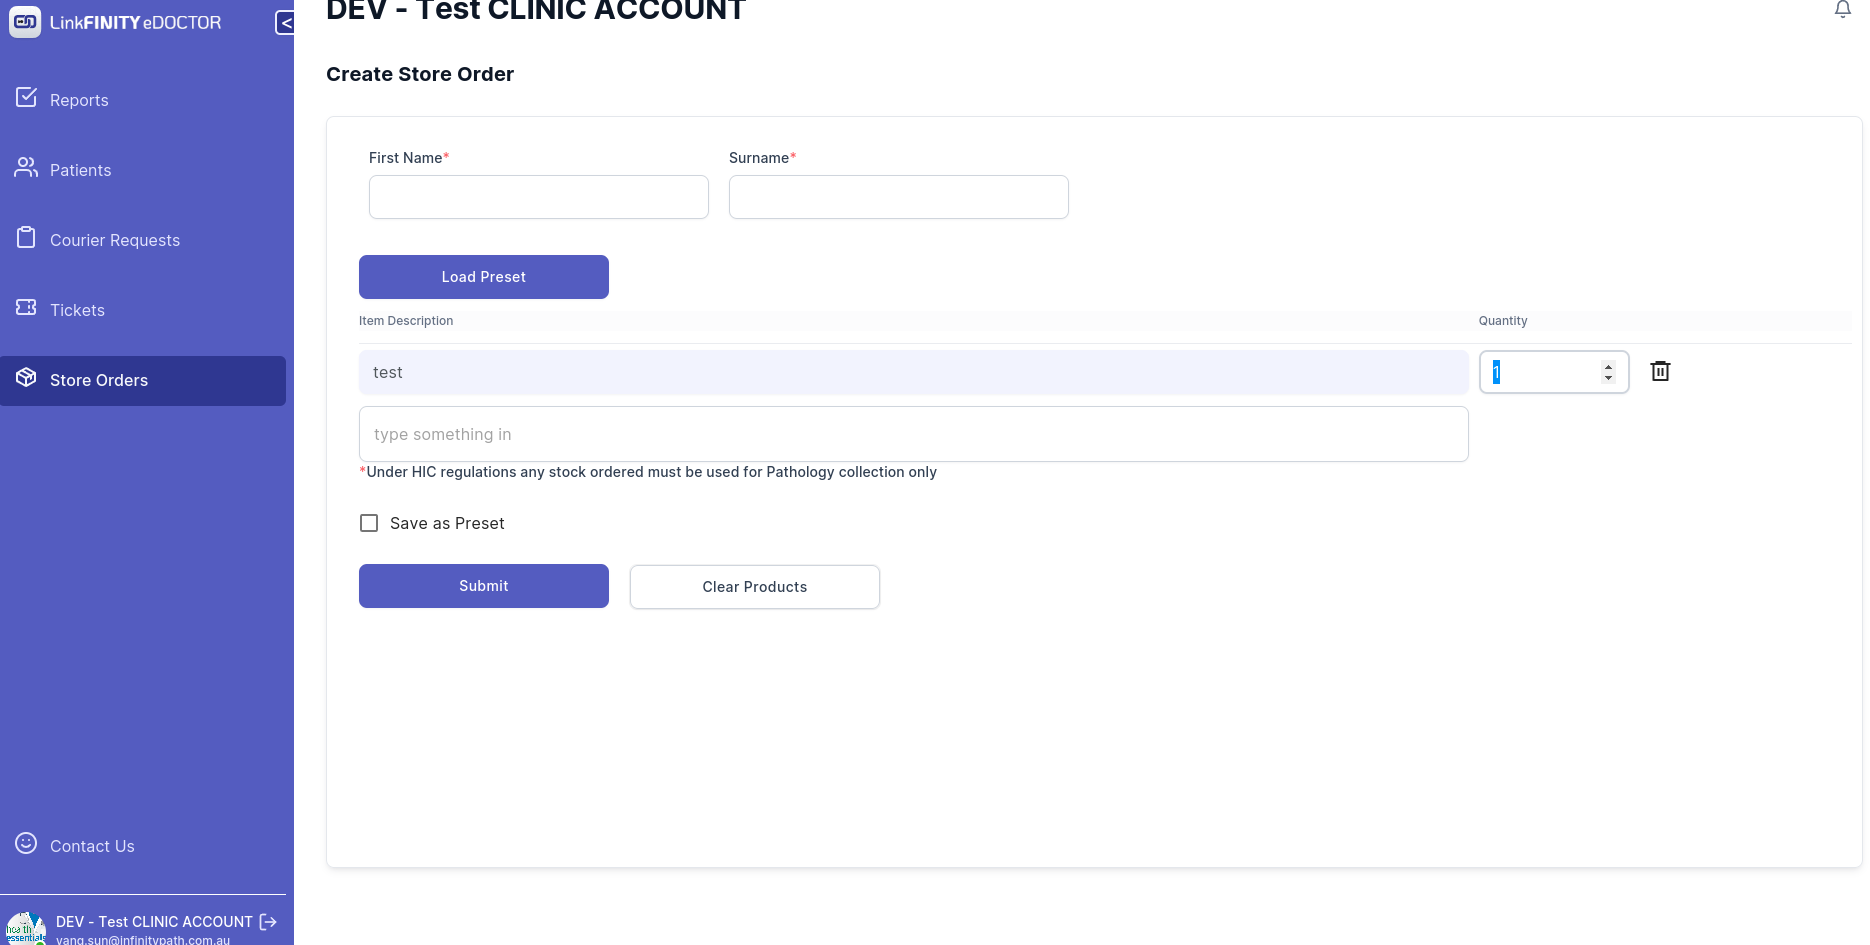
8. repeat the process and once you get all the products you need.
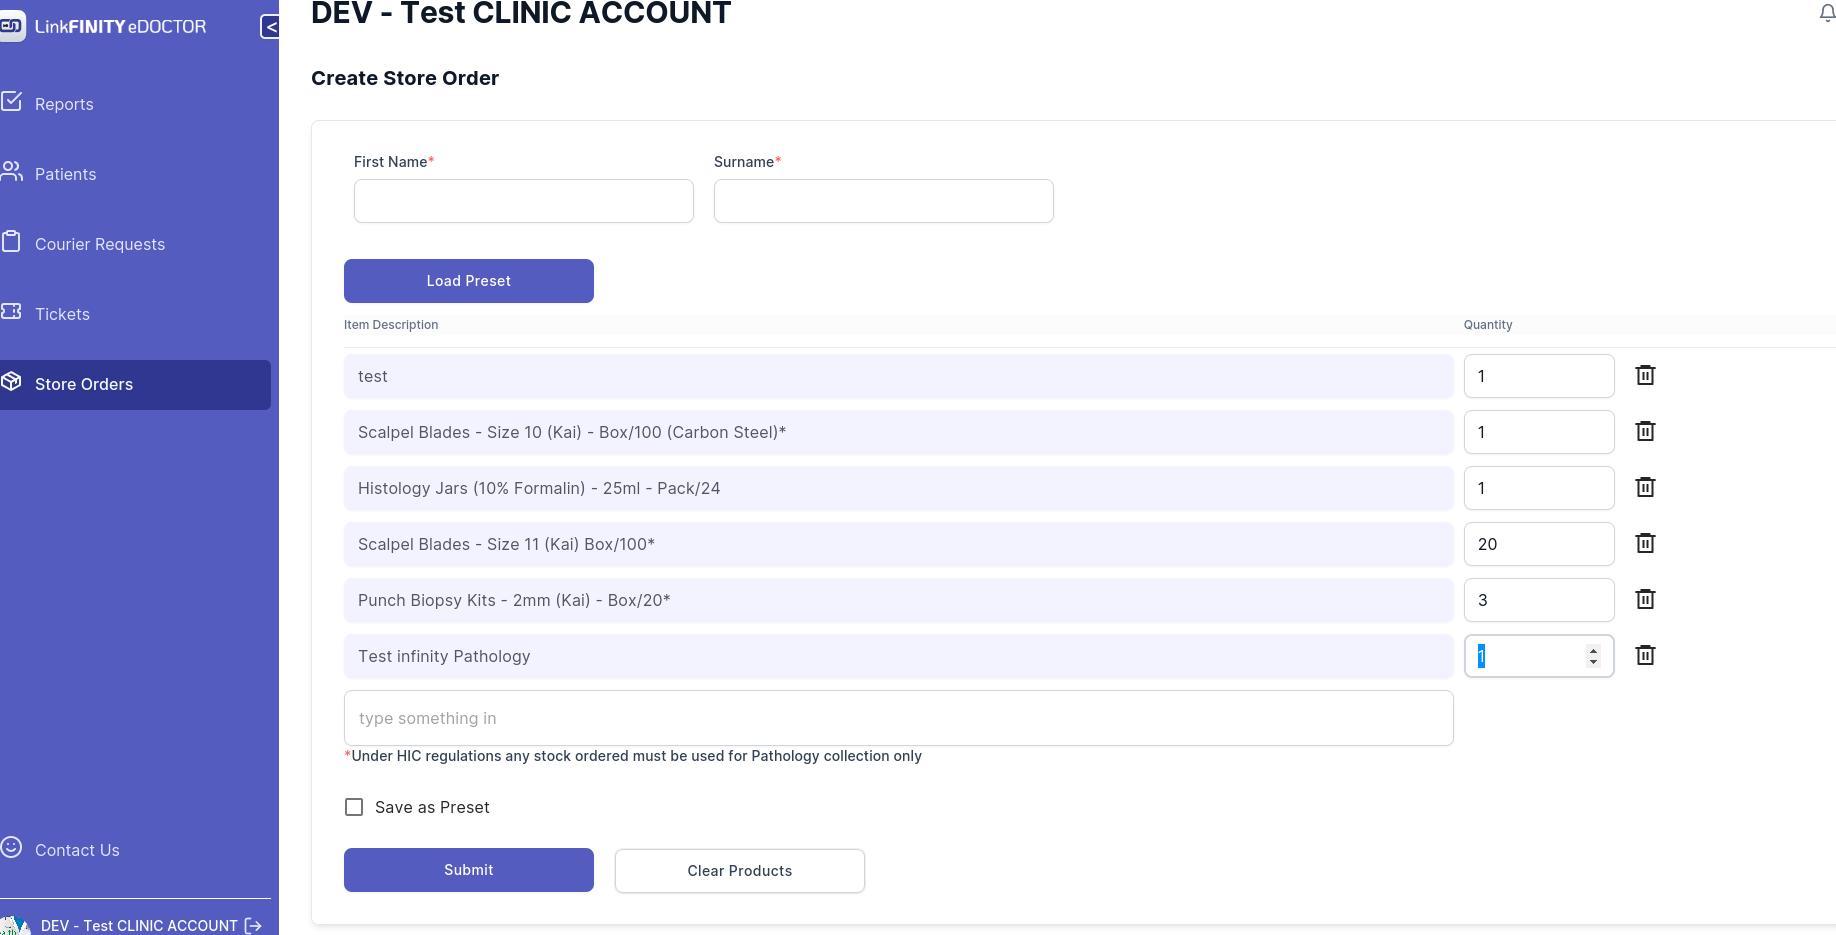
9. you can also save this order as a preset so it saves the hassle of typing everything in each time you want to make a store order.
10. Click on submit button
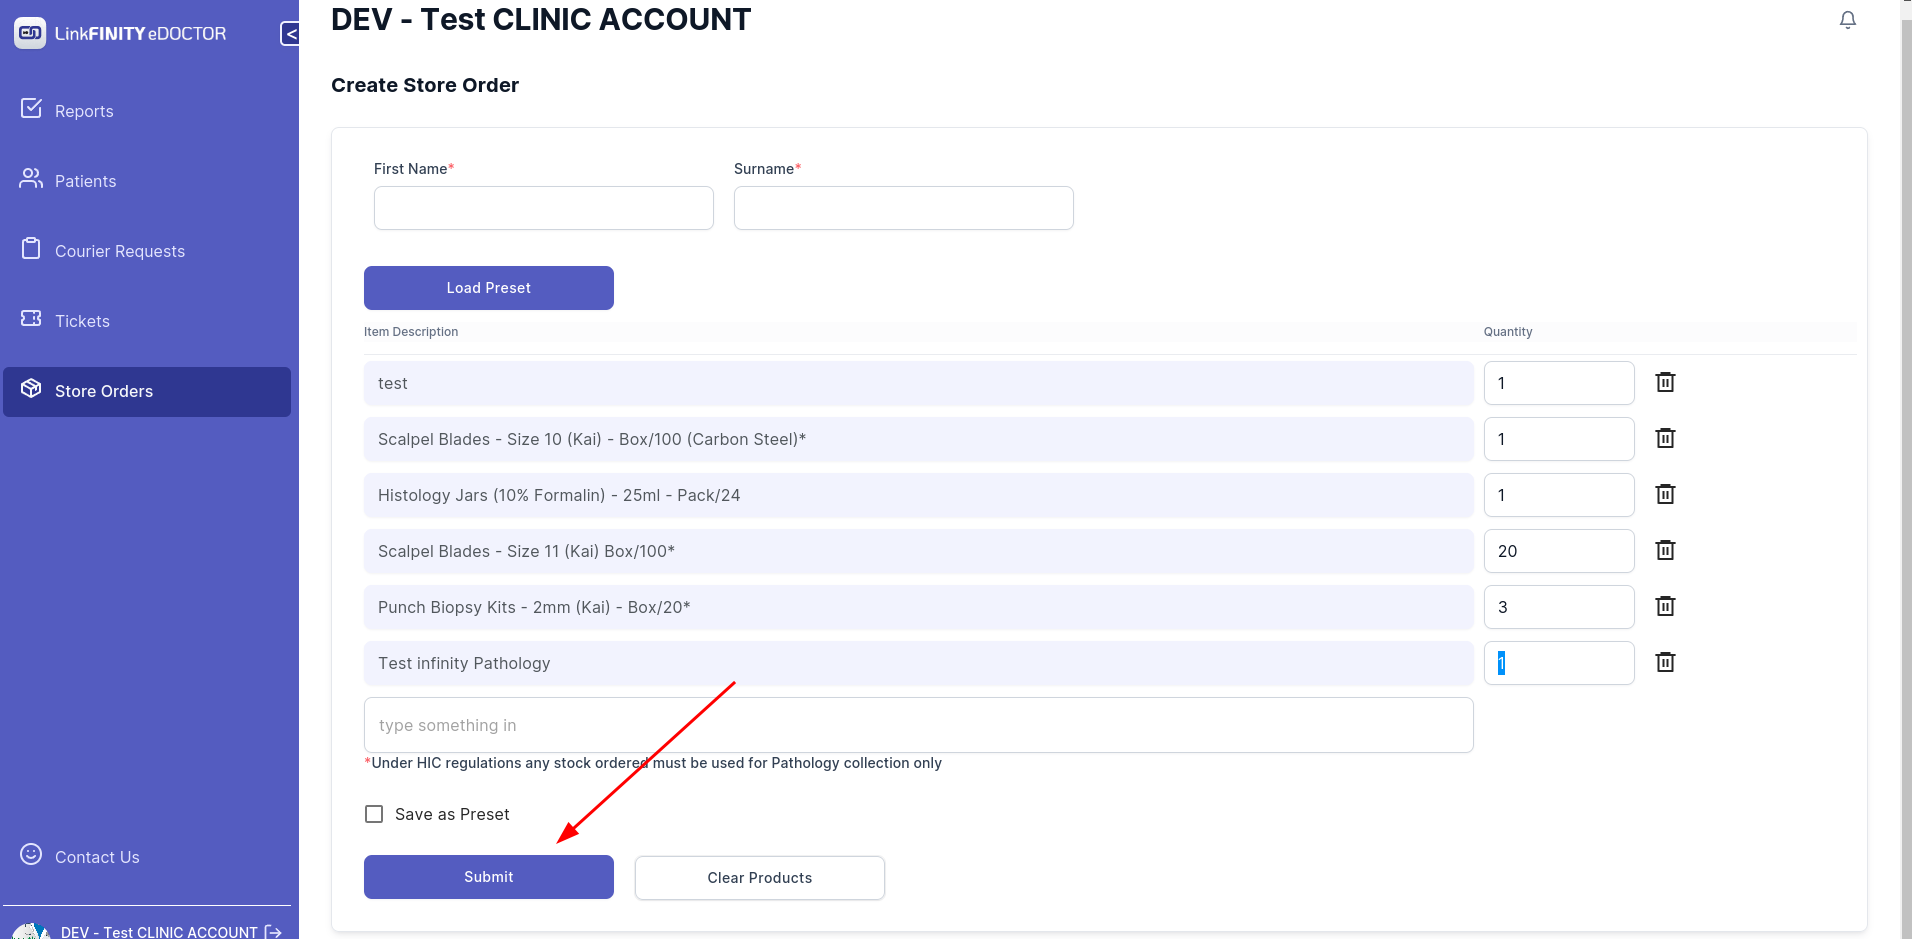
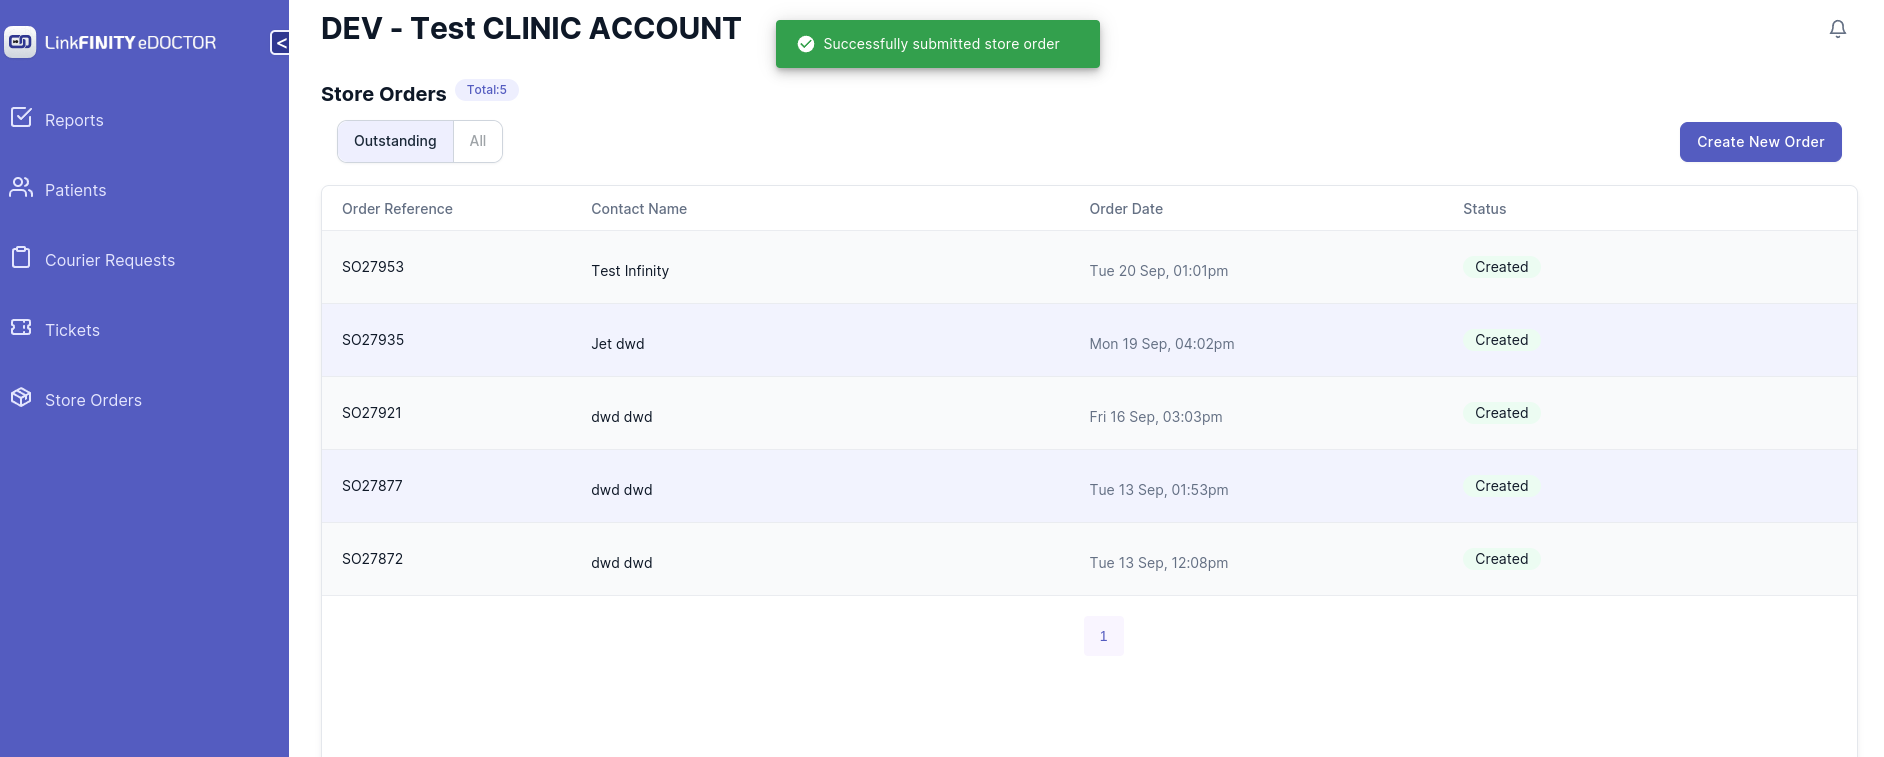
11. If you get below message that means the order has been submitted successfully.
if you encountered a problem. please send a email to eDoctor@linkfinity.com.au for support.
Order an item that is not listed in the products list
If you are unable to locate the item you need on the list, simply enter a name or description of the item in the search box and click "Add new product." Then, select the quantity you wish to order.
If you encounter any problems, please don't hesitate to contact us.
How to create pick up request (Specimen ready for collection)
-
Access the Platform:
- Go to https://edoctor.linkfinity.com.au/ in your web browser.
-
Initiate a New Request:
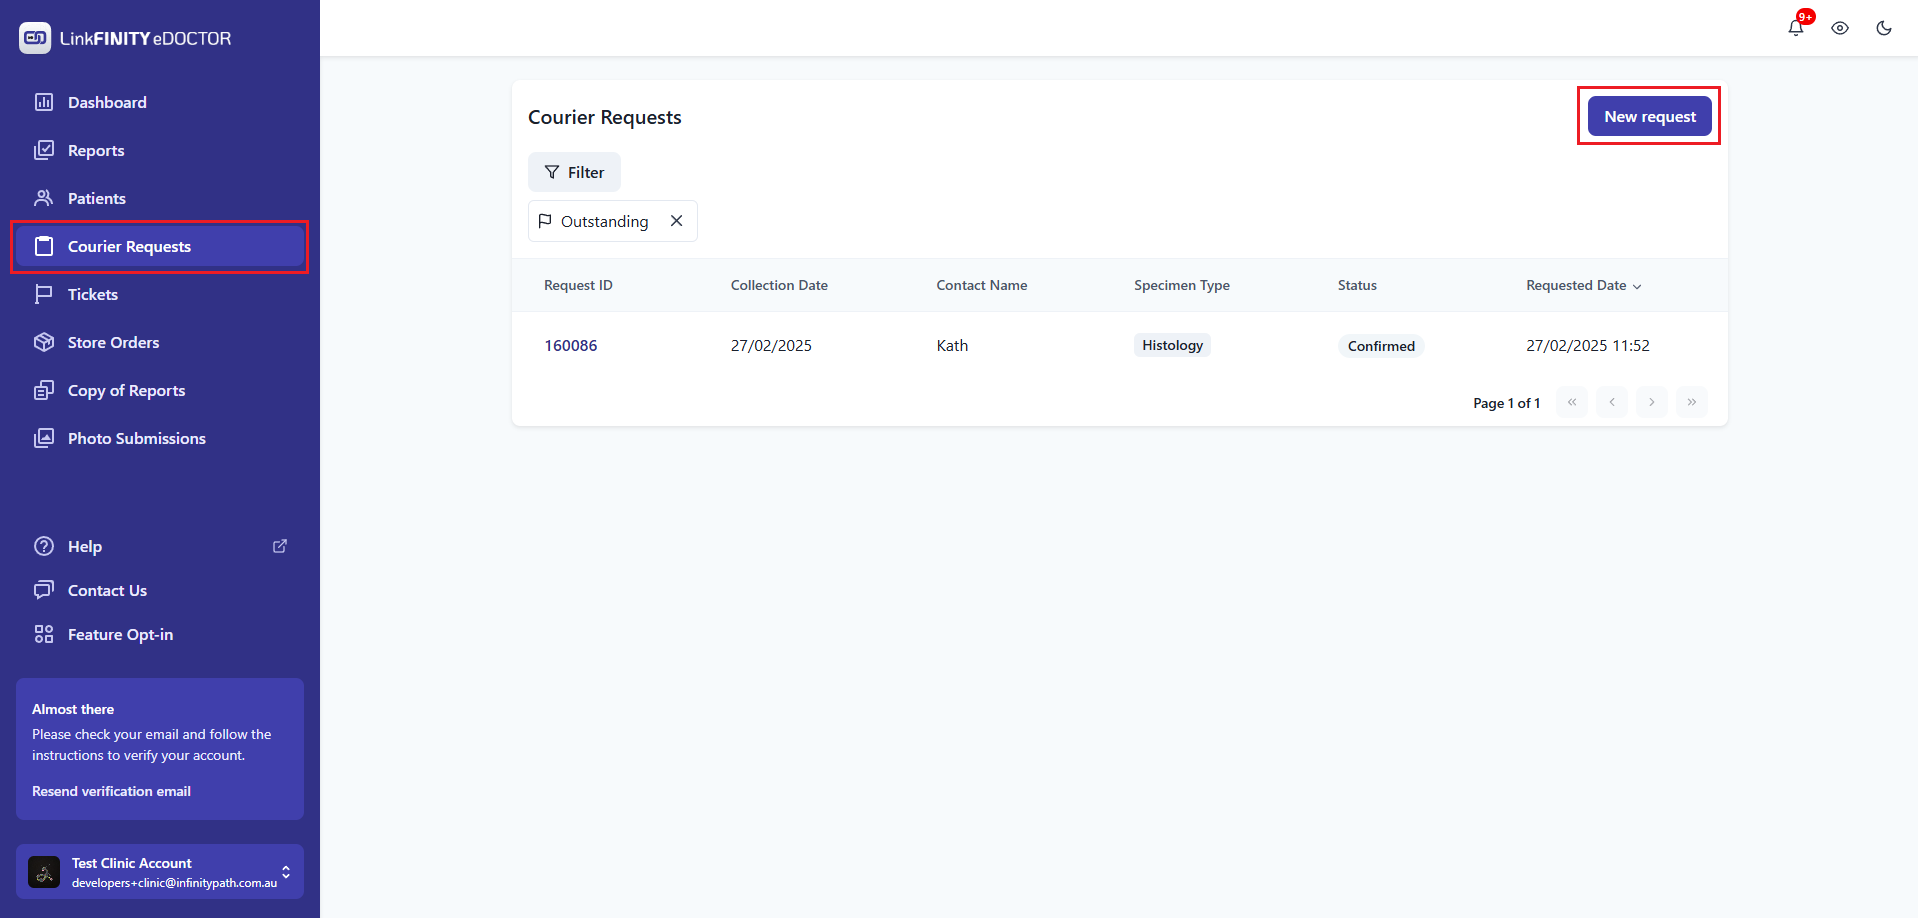
- In the sidebar, select Courier Requests.
- Click on the New request button.
-
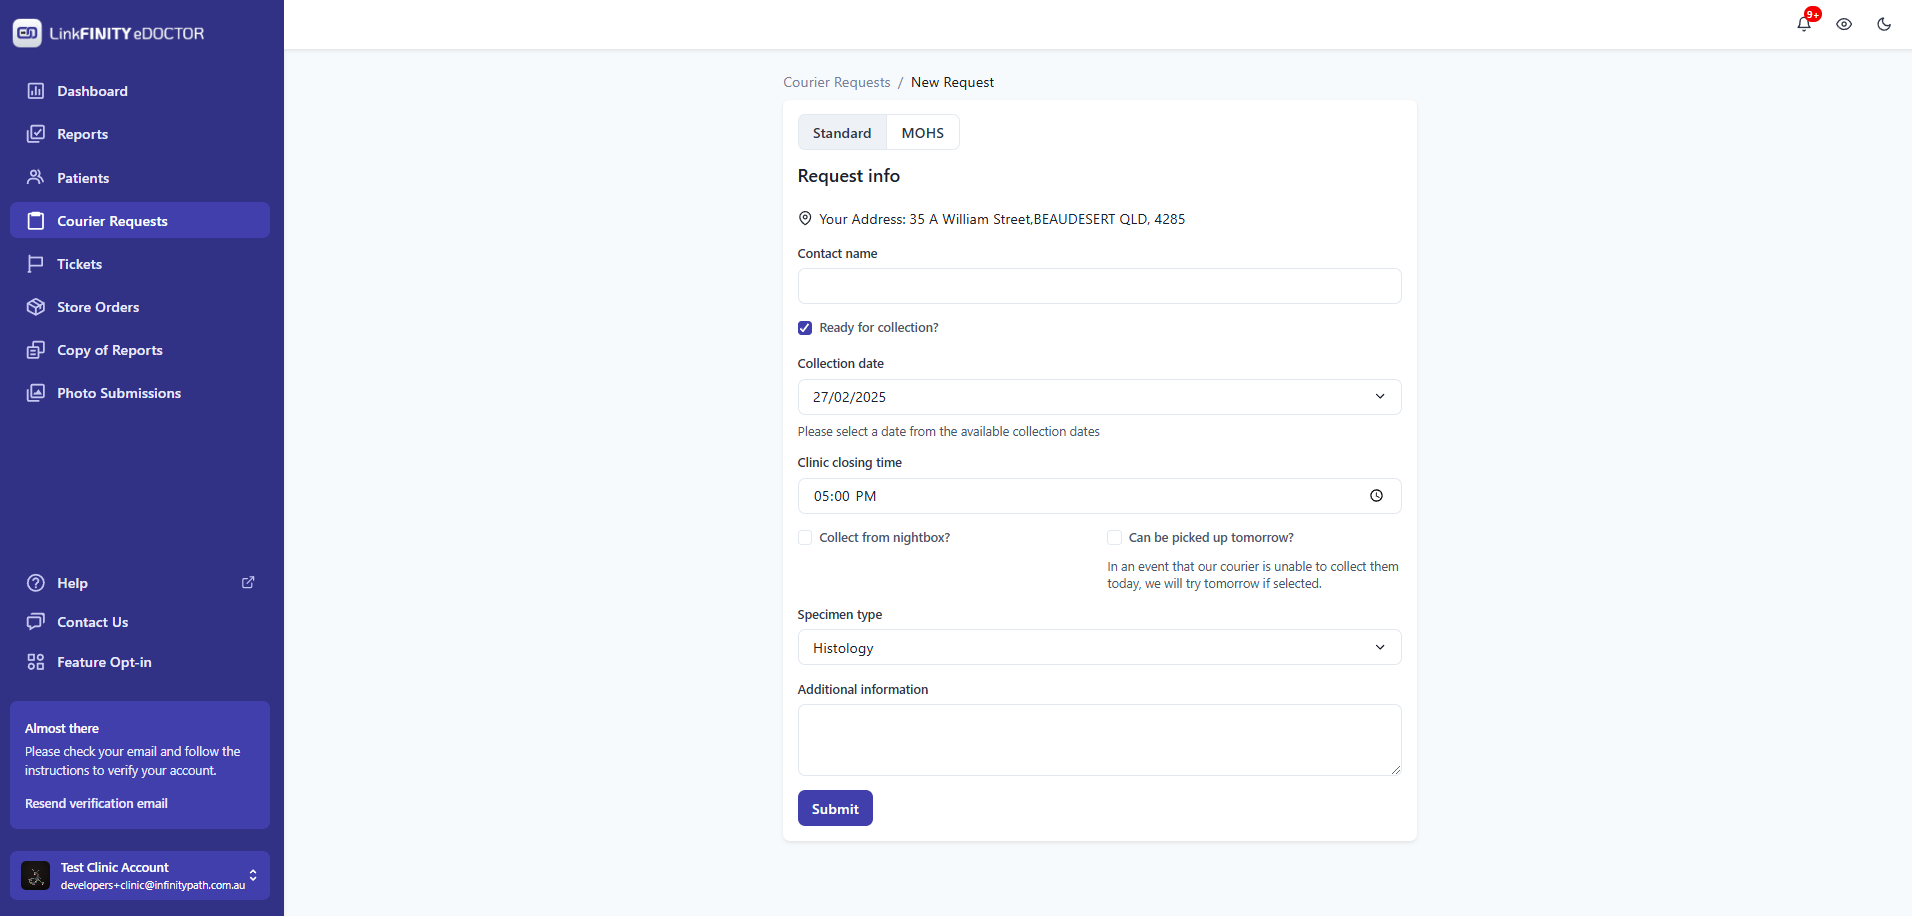
For a Standard Request:
- Verify Address: Ensure your address is correct. Contact support if it isn't.
- Enter Request Details: Fill in all necessary information about the collection.
- Submit the Request: Click Submit to finalize.
-
For a MOHS Request:
- Verify Address: Confirm your address is accurate. Reach out to support if changes are needed.
- Input Detailed Information: Include all request details, such as Date of Birth (DOB).
- Acknowledge Additional Charges: Check the box to accept any extra fees associated with MOHS requests.
- Finalize Submission: Click Submit to complete your request.

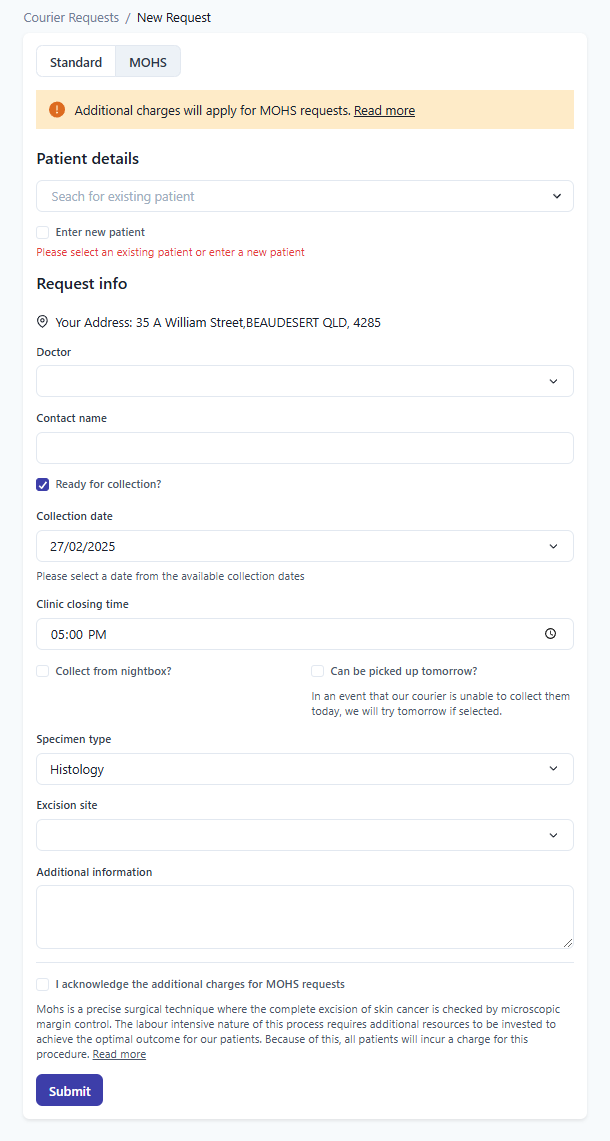
By following these steps, you can efficiently manage and track your courier requests for medical specimens.
How to download eDoctor on your phone
Iphone user

Android user

Web
Please Click on this link to navigate to eDoctor
https://edoctor.linkfinity.com.au
How to reset the password
-
Open eDoctor by this link as below https://edoctor.linkfinity.com.au/
-
Hit "Forgot Password? "
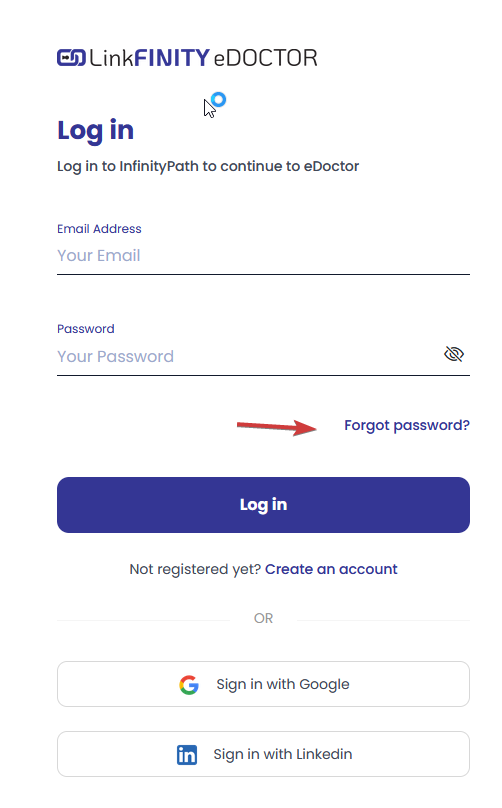
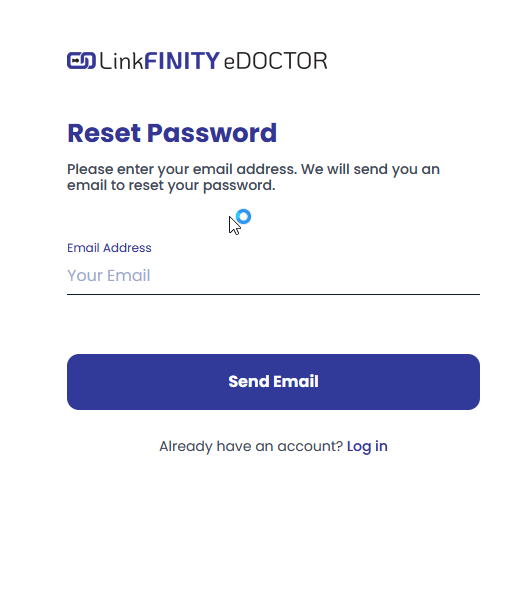
- Then fill email in and hit "Send Email"
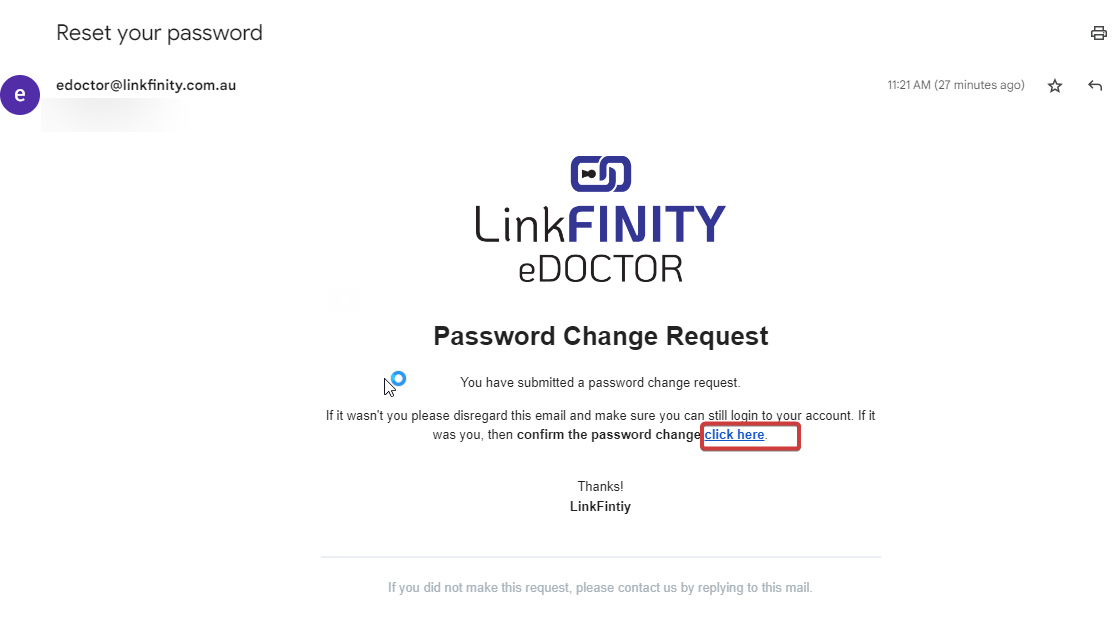
- Then click on "Click Here" in order to enter the NEW password
Requesting Histopathology Reports via eDoctor
This guide will help you efficiently request histopathology reports using the eDoctor platform. This feature is especially useful for patients transitioning between medical centers, ensuring their medical history is readily accessible. Most requests are processed within 1-3 minutes.
-
Access eDoctor:
-
Create a New Request:
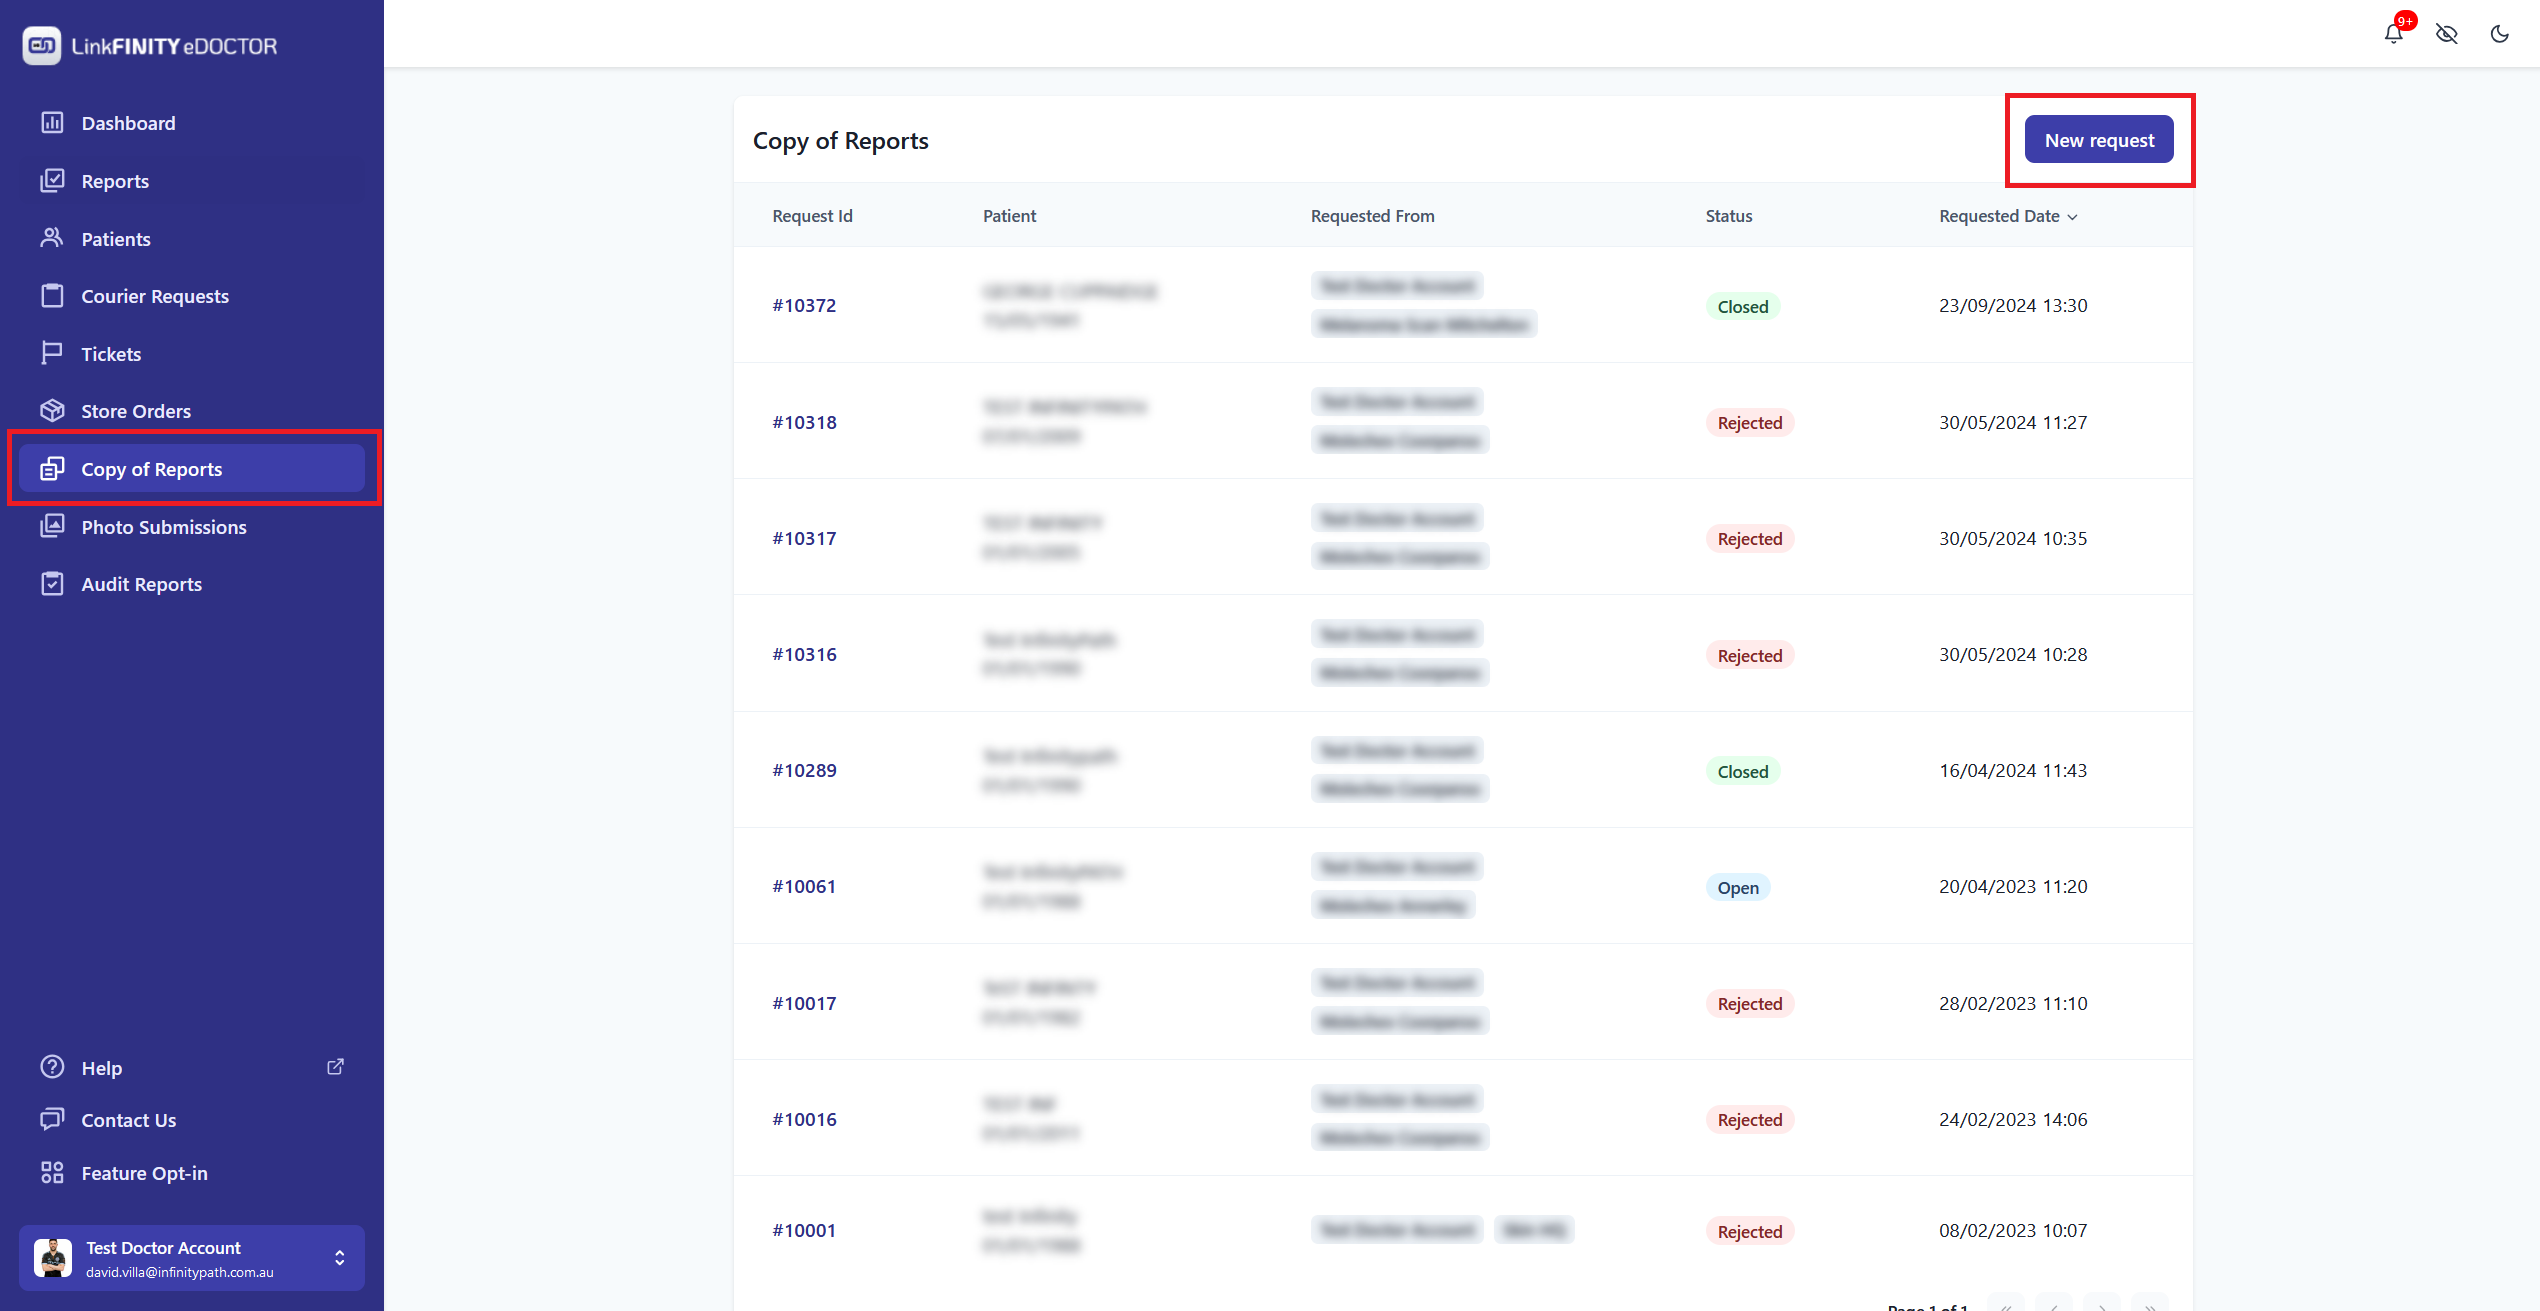
- Navigate to Copy of Reports in the sidebar.
- Click on New request.
-
Fill in the Required Information:
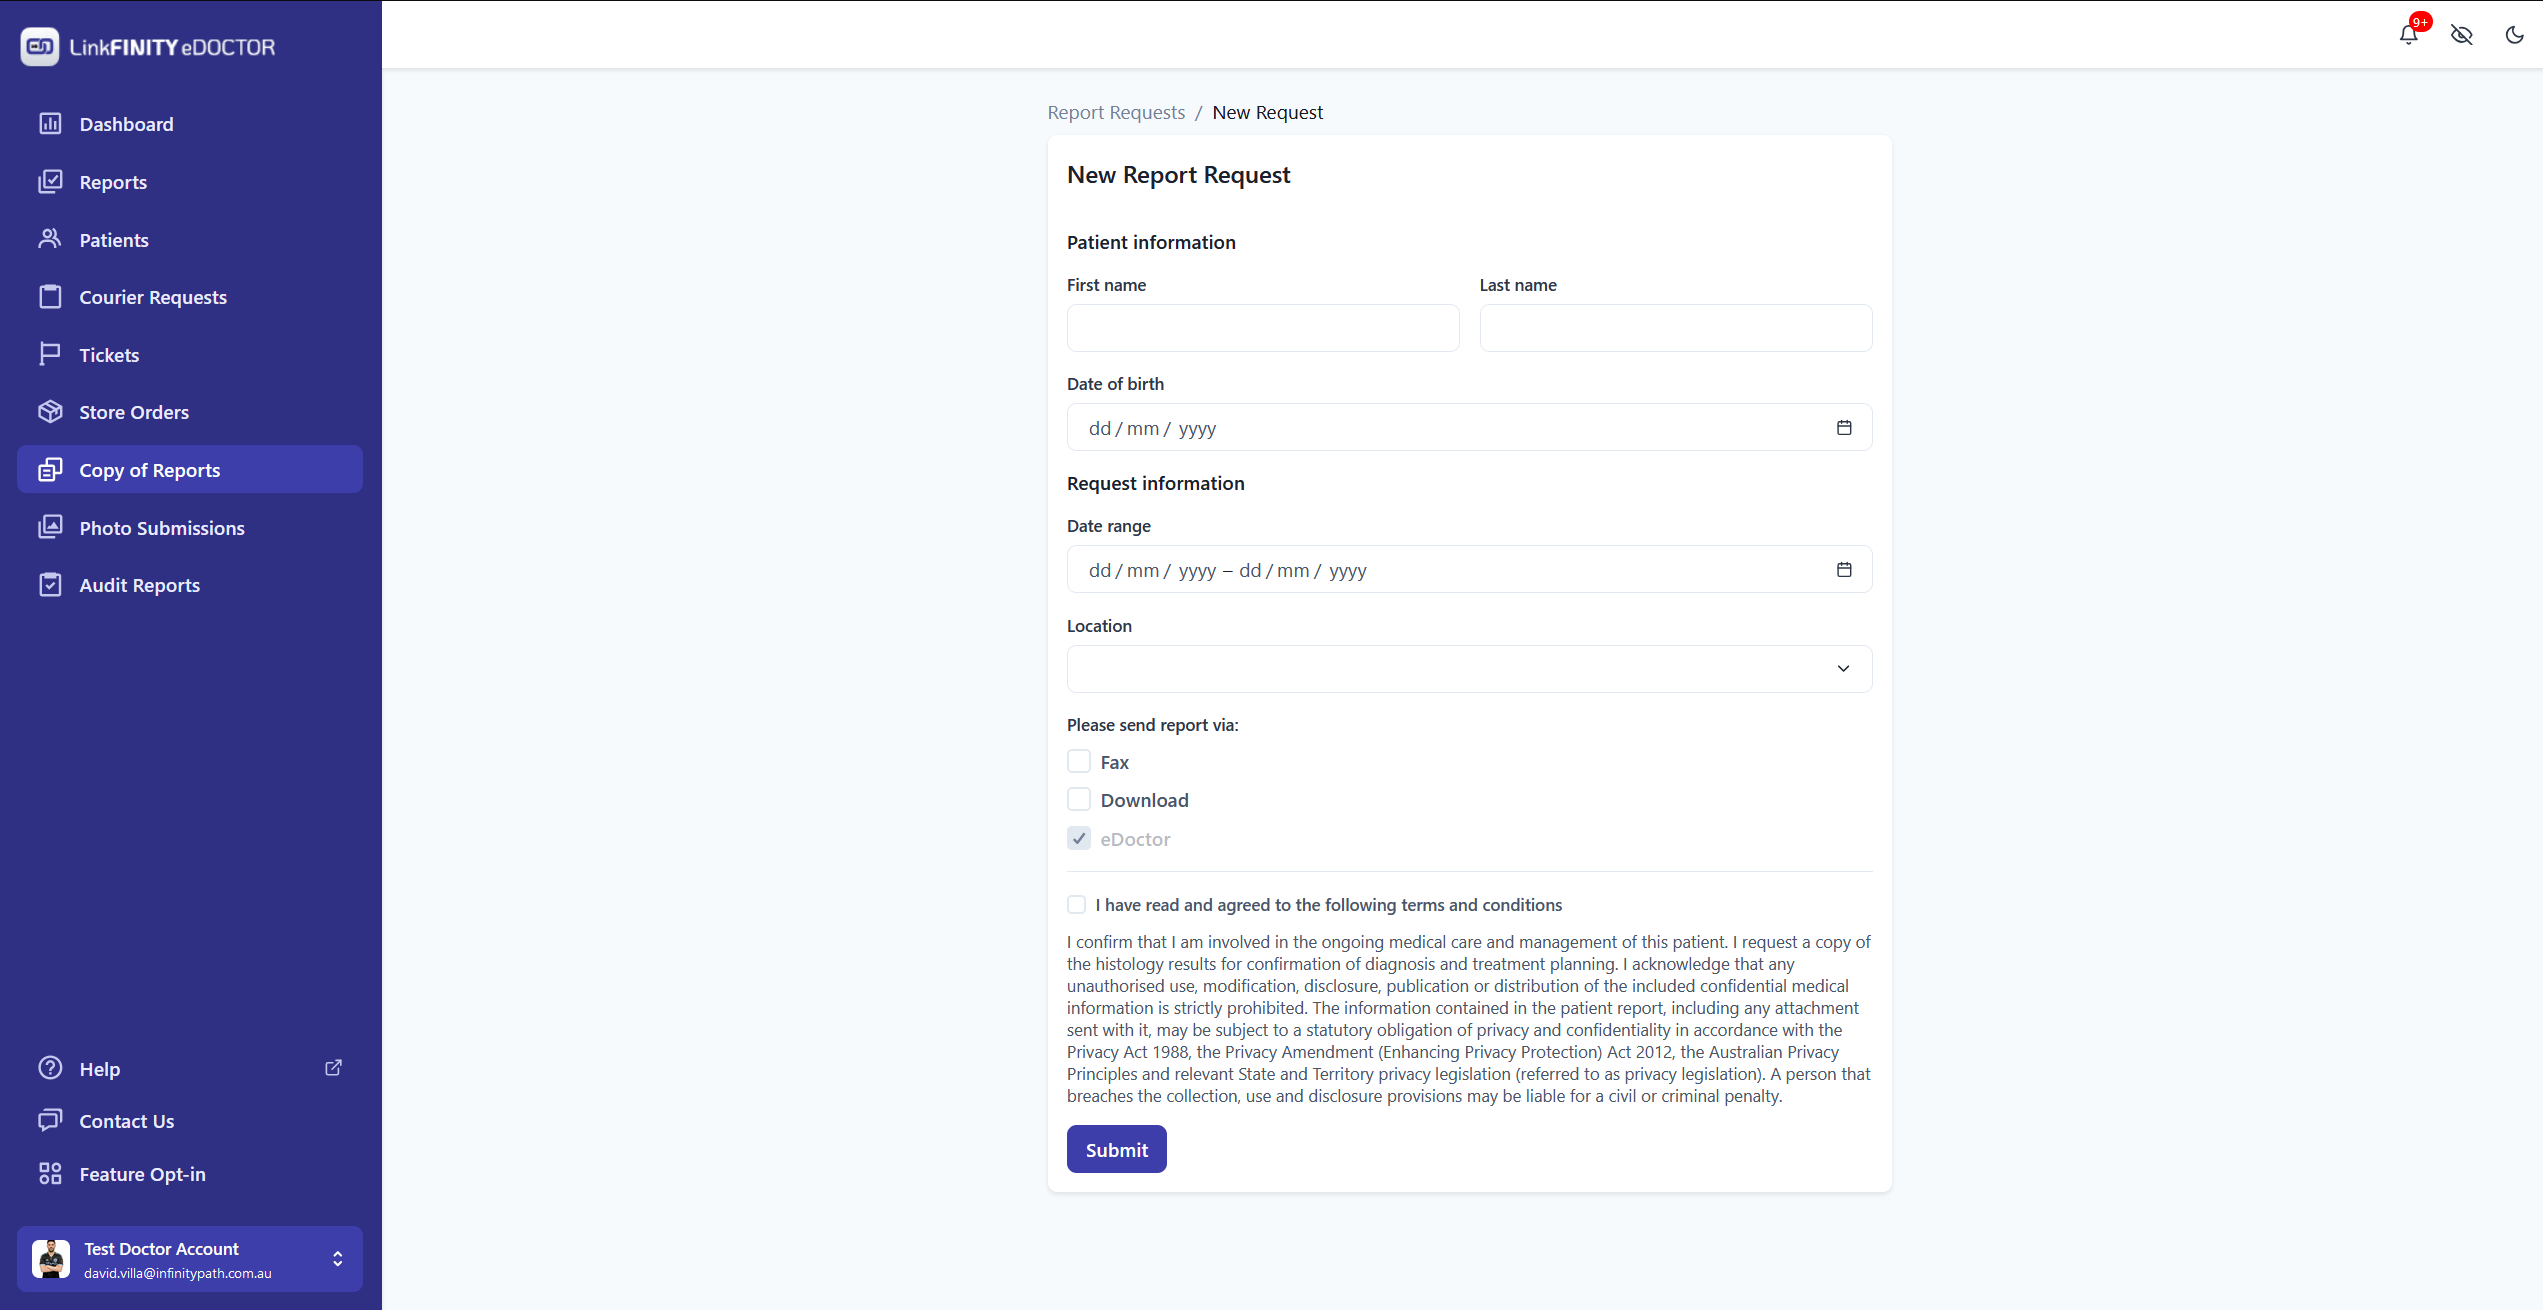
- Enter patient details: First Name and Last Name.
- Provide the Request Information, including Date of Birth (DOB) and any other necessary details.
-
Submit Your Request:
- Read and agree to the terms and conditions.
- Click Submit to finalise the request.
Please ensure all information is accurate to expedite the process.
Upload Clinical Photos
-
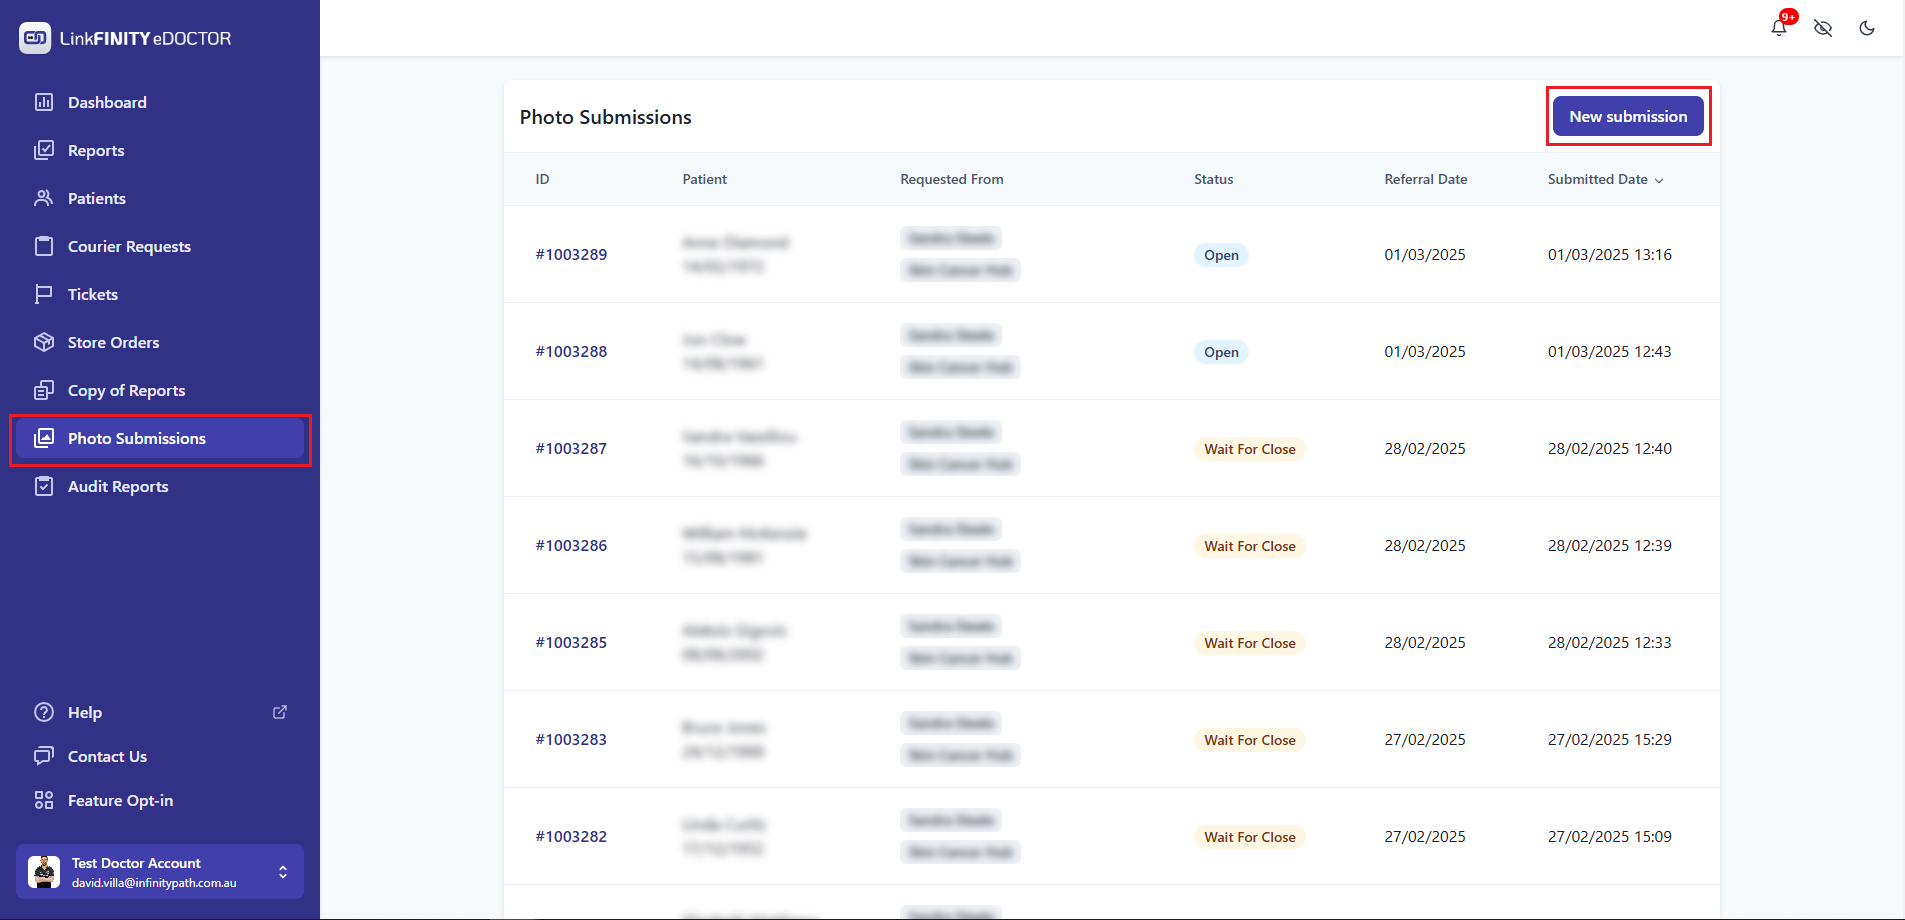
Go to Photo Submissions: In the left sidebar menu, click on "Photo Submissions".
-
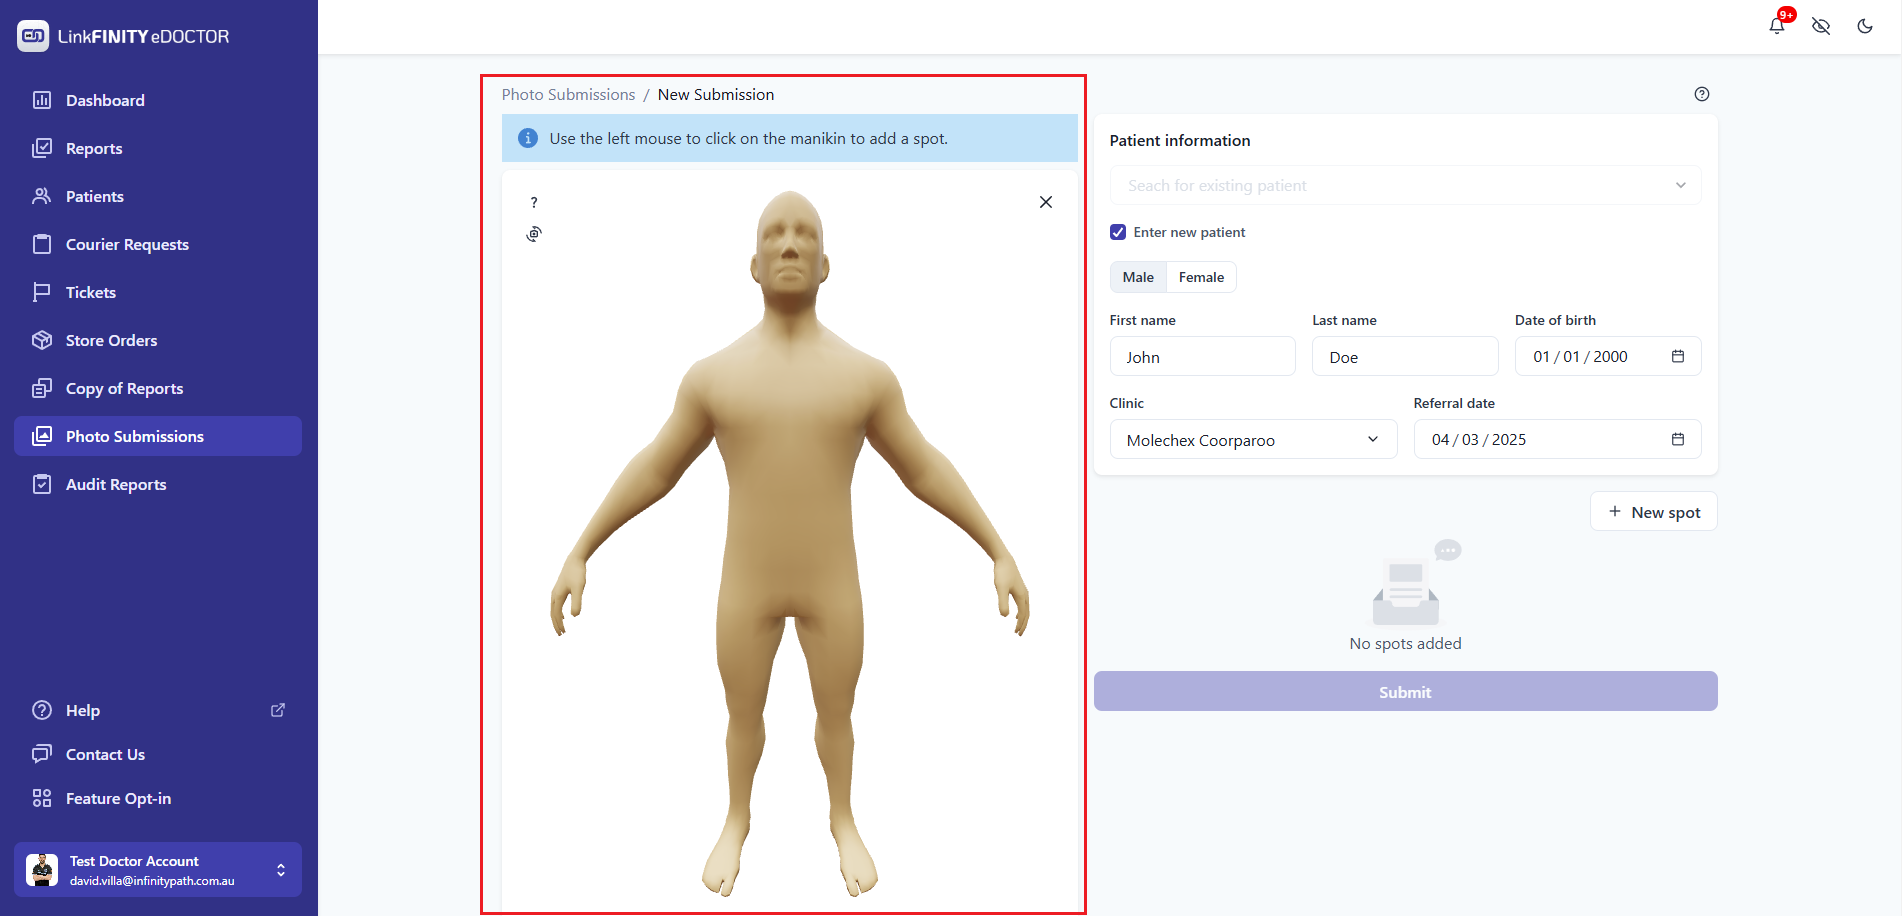
Start a New Submission: Click the "New submission" button, found in the upper-right area of the Photo Submissions page.

-
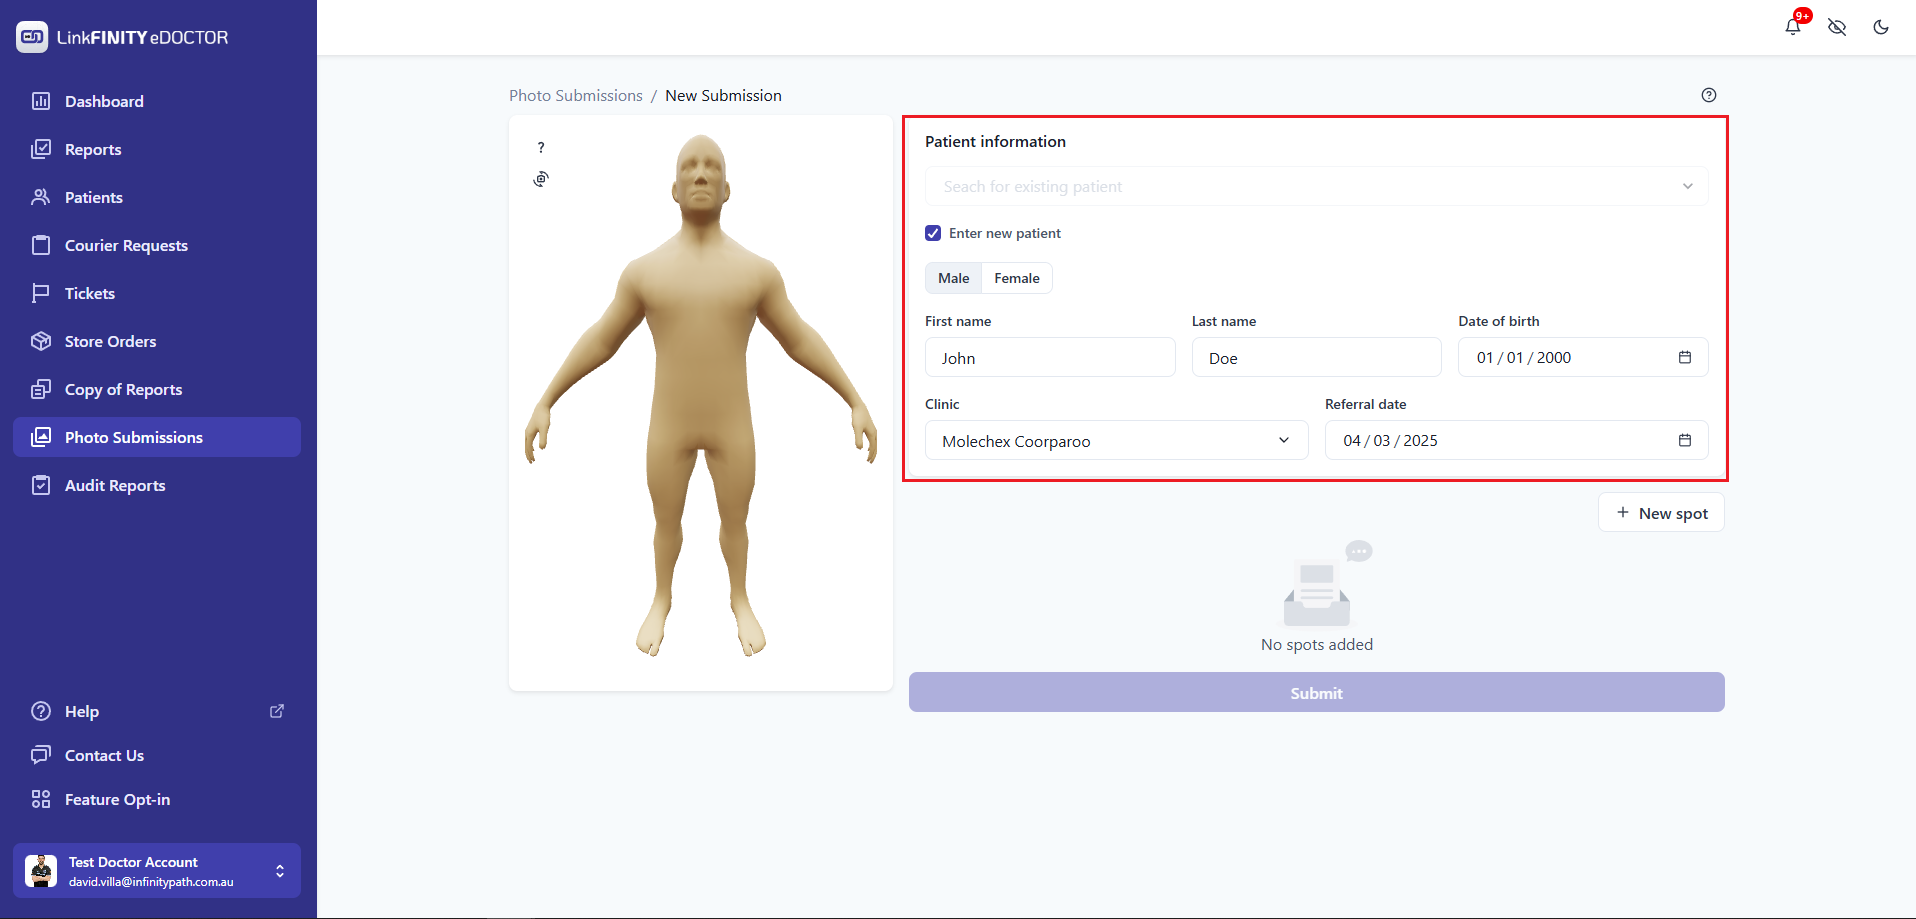
Enter Patient Information:
- Search for Existing Patient: Use the "Search for existing patient" dropdown to find the patient.
- OR Enter New Patient: If the patient is new, choose the "Enter new patient" radio button (Male/Female).
- Fill in the "First name", "Last name", and "Date of birth" fields.
- Select the "Clinic" from the dropdown menu.
- Enter the "Referral date".

-
Add Spots:
- Click the "+ New spot" button to start adding a new spot.
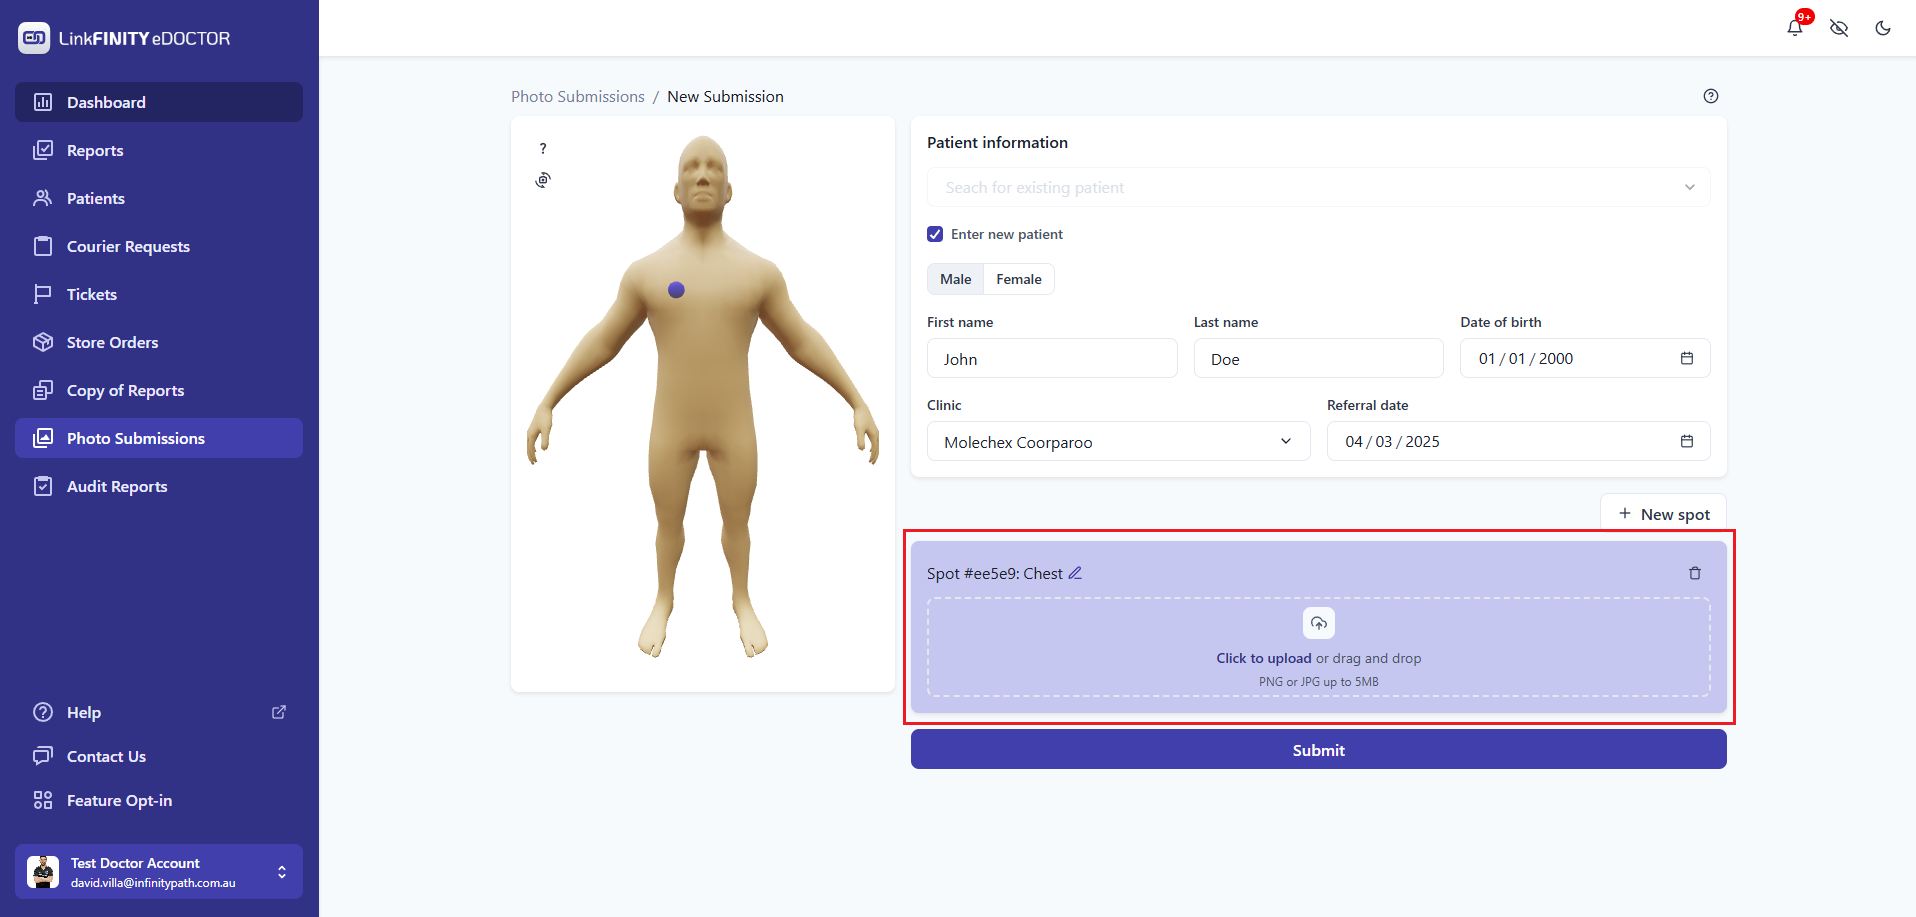
- Add spots: Use the left mouse button to click on the manikin (3D human model) to add a spot to the body.

-
Upload Photos for Each Spot:
- For each spot added: click on spot location, and then click "Click to upload" within the spot area to browse your files and select the corresponding photo.
- Alternatively, drag and drop the photo directly into the spot area.

-
Submit the Submission: Once you've added all spots and uploaded the relevant photos, click the "Submit" button.
How to submit a report inquiry
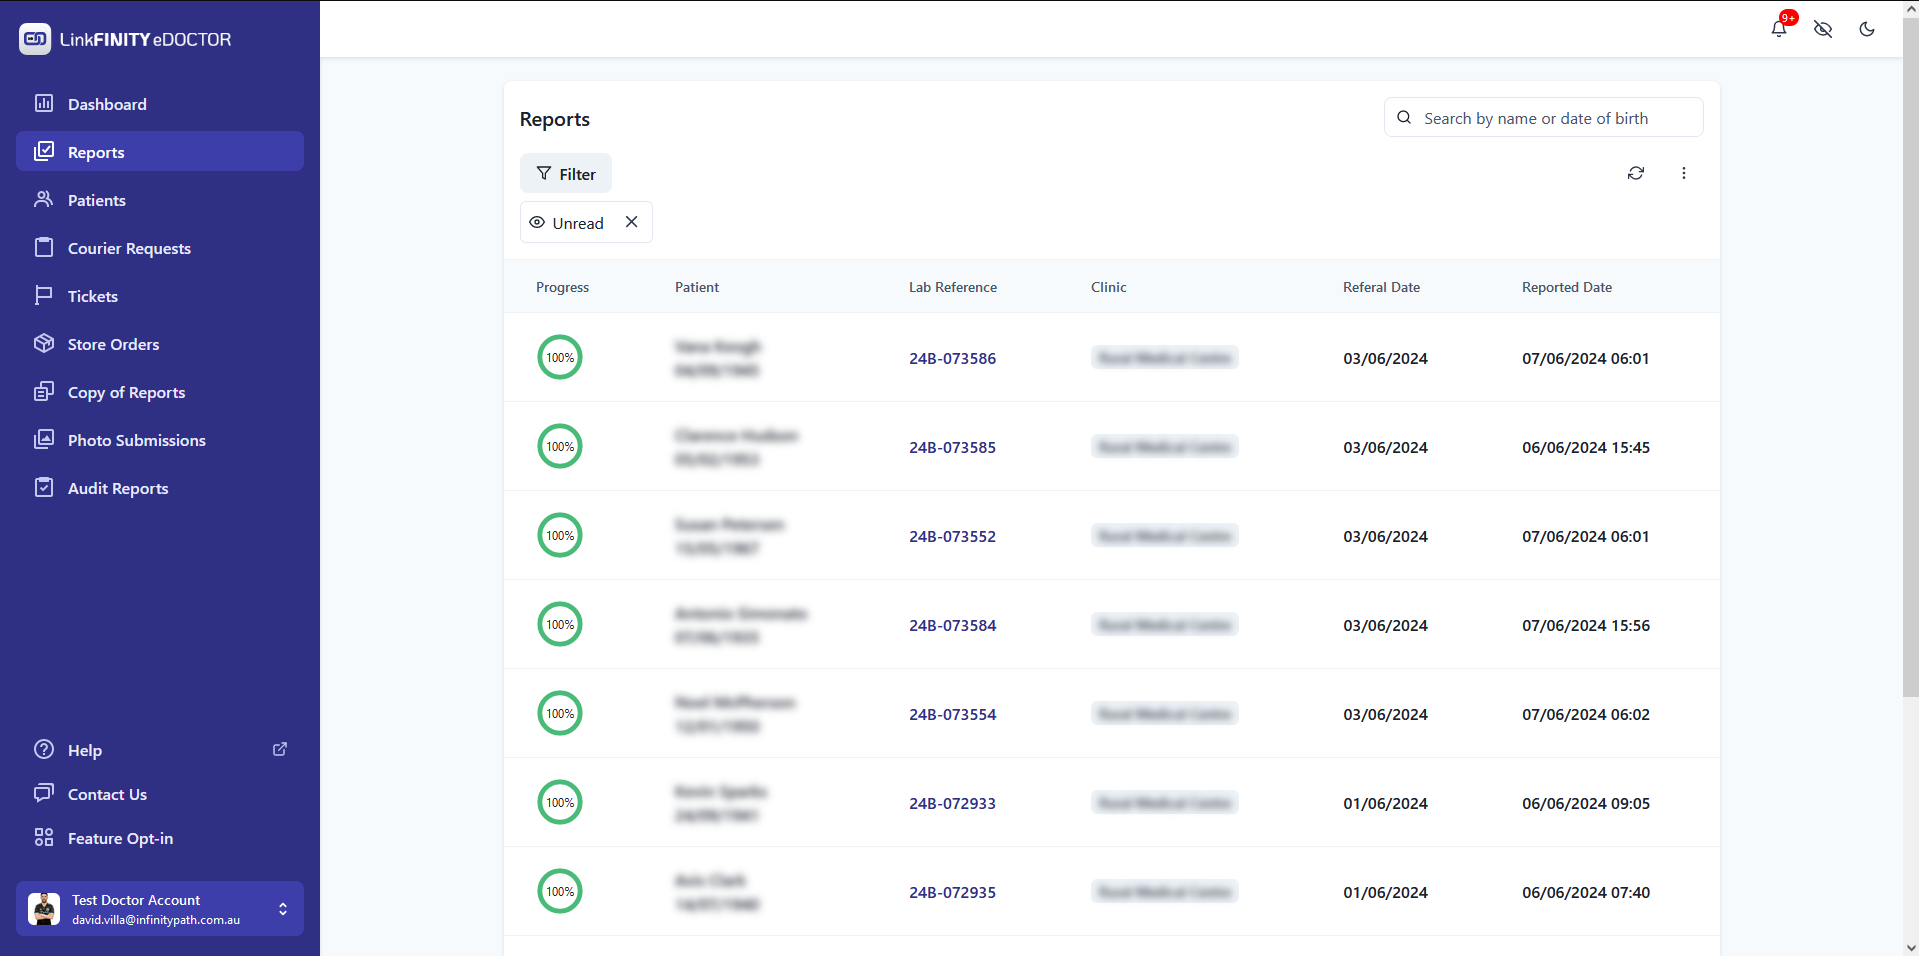
2. Click on the report that you would like to create a ticket
3. Click on Submit Inquiry
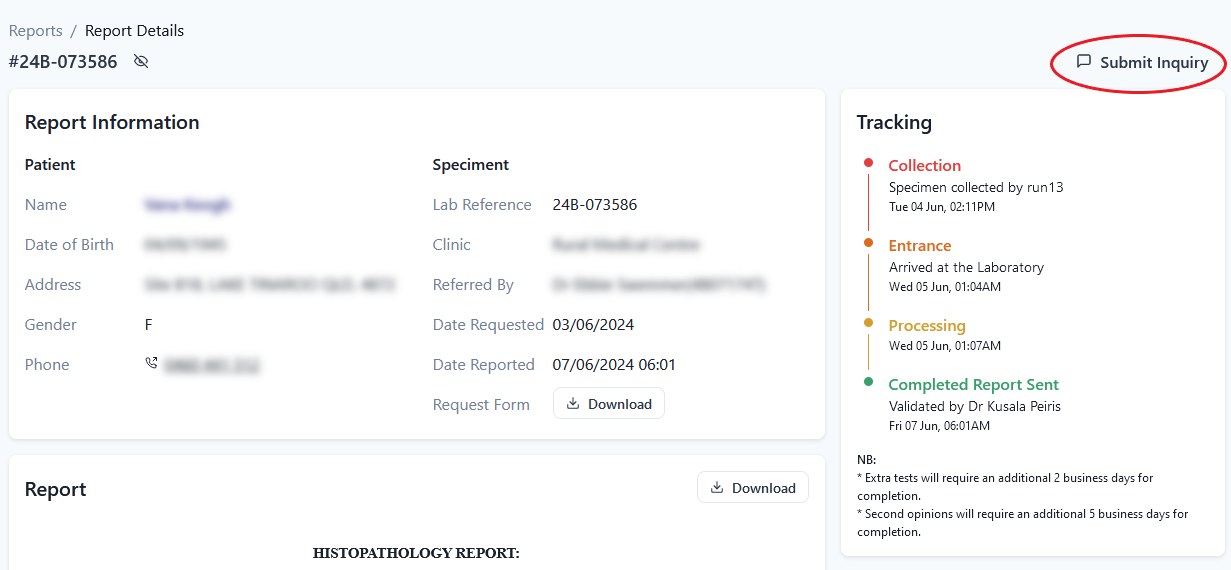
4. Choose a request type and add a descriptive description about the ticket.
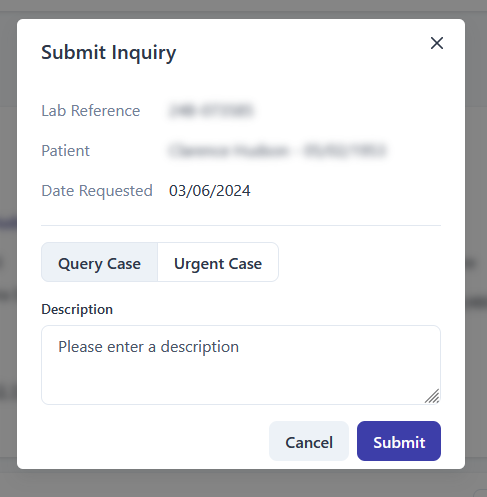
5. Click Submit
Your can view and track your submitted in the Tickets tab